20 Must-Know Advanced Linux Commands for Mid-Level Users
You may have found the first article, ‘Useful Commands for Beginners‘ very helpful, as it was intended for newbies, this article is tailored for middle-level and advanced users.
It covers topics such as customizing search, understanding processes and how to terminate them, optimizing the Linux terminal for productivity, and compiling C, C++, and Java programs in a Unix-like environment.
21. find Command
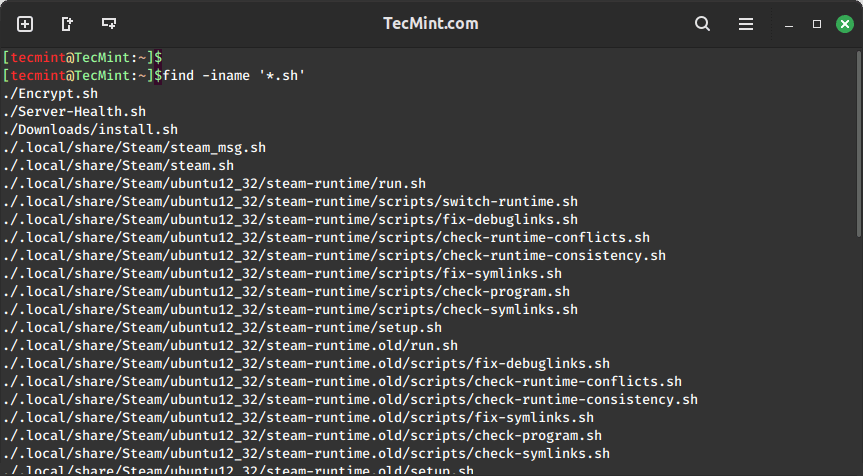
The find command is used to search for files in the given directory, hierarchically starting at the parent directory and moving to sub-directories.
find -name *.sh
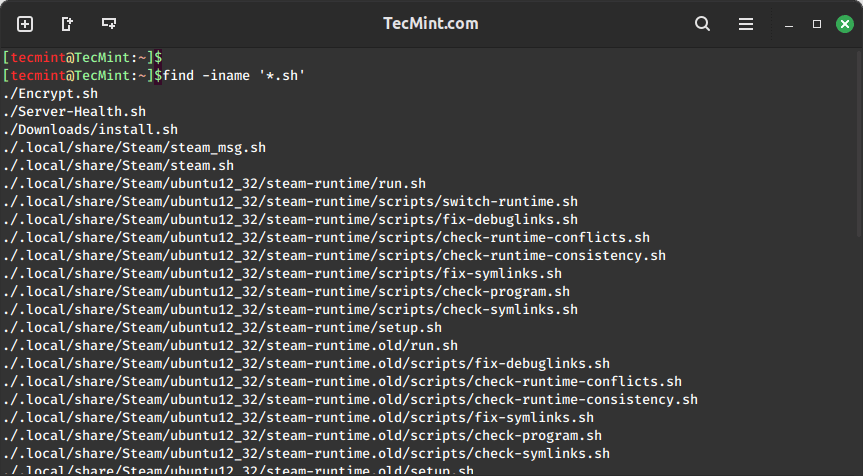
The -name option makes the search case sensitive. You can use the -iname option to find case-insensitive files with different capitalization patterns in the extension.
The * is a wildcard and searches all the files having an extension .sh you can use a filename or a part of the file name to customize the output.
find -iname *.SH
The following command is used to search for all files having extension ".tar.gz" in the current directory and its subdirectories including mounted devices.
find -name *.tar.gz
22. grep Command
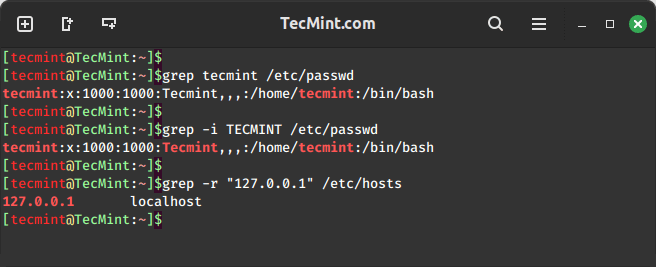
The grep command searches a specified file for lines that contain a match to provided strings or words.
In this case, it is used to search for the ‘tecmint‘ user in the ‘/etc/passwd‘ file.
grep tecmint /etc/passwd
The -i option is used to search for the string “TECMINT” (case-insensitive) in the ‘/etc/passwd‘ file.
grep -i TECMINT /etc/passwd
The -r option is used to recursively search for the string “127.0.0.1” in the ‘/etc/hosts‘ file.
grep -r "127.0.0.1" /etc/hosts
23. man Command
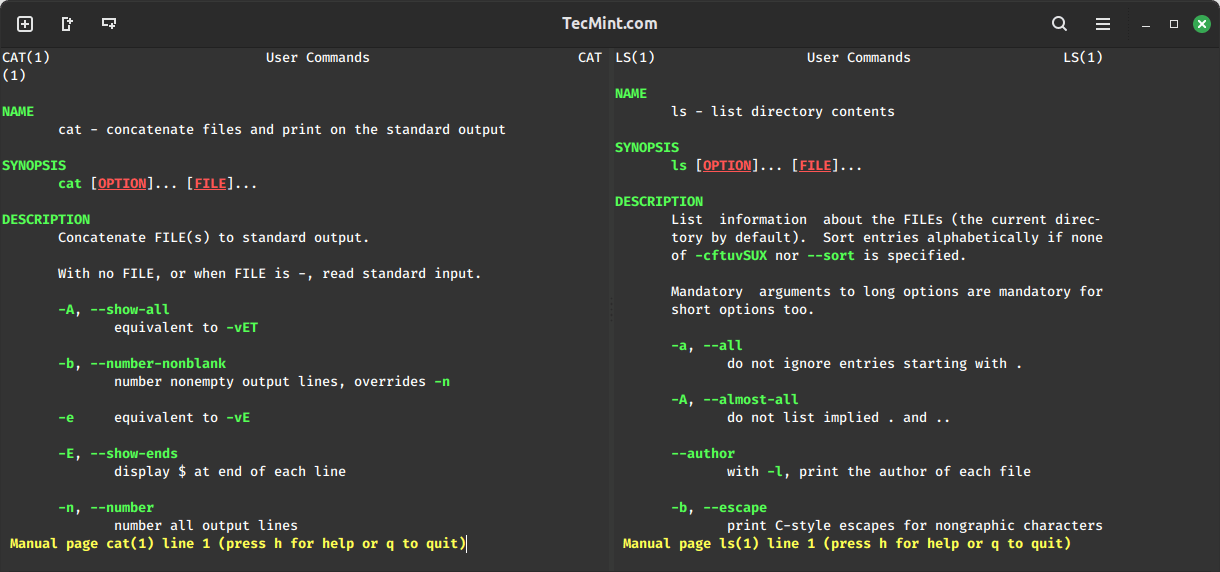
The man command is the system’s manual pager, which provides online documentation for all the possible options with a command and its usage.
Almost all the Linux commands come with their corresponding manual pages. For example, the following ‘man cat‘ (Manual page for cat command) and ‘man ls‘ (Manual page for command ls) display the manual pages for a given command.
man cat
man ls
24. ps Command
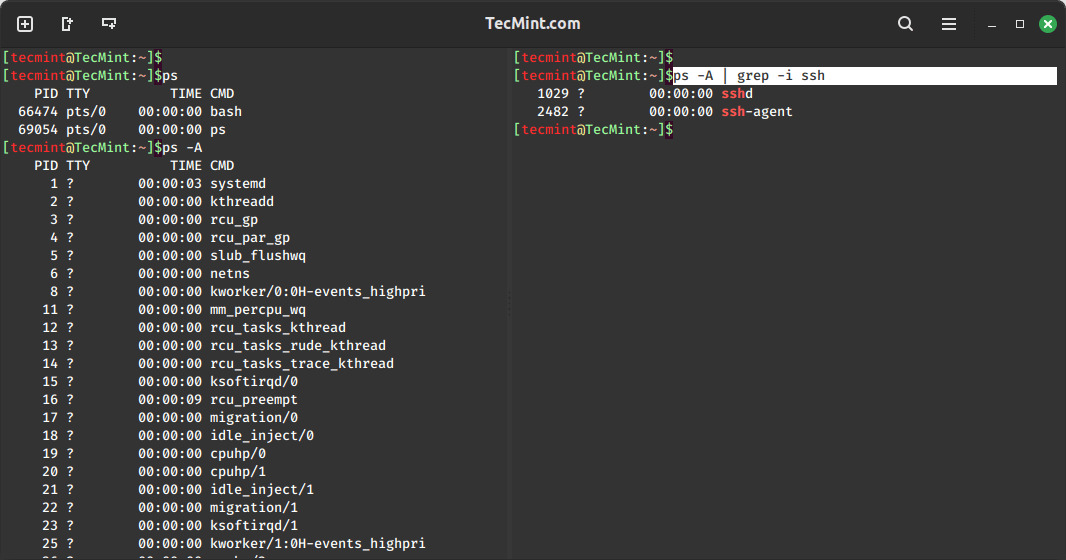
The ps command gives the status of running processes with a unique ID called PID.
ps
To list status of all the processes along with process ID and PID, use option -A.
ps -A
The ps command is very useful when you want to know which processes are running or may need PID sometimes, for a process to be killed. You can use it with the grep command to find customized output.
ps -A | grep -i ssh
Here ps is pipelined with grep command to find customised and relevant output of our need.
25. kill Command
The kill command in Linux is crucial for terminating unresponsive or irrelevant processes efficiently. Unlike Windows, where restarting is often required after killing a process, Linux allows you to kill and restart processes without rebooting the entire system.
For example, if you need to terminate the ‘firefox‘ program if it’s not responding, you can use the ps command along with grep to find the process pid and then use the ‘kill‘ command to stop the process.
ps -A | grep -i firefox
kill 69881
Every time you re-run a process or start a system, a new pid is generated for each process and you can know about the currently running processes and their pid using the command ‘ps‘.

Another way to kill the same process is.
pkill apache2
The kill command requires job id/process id for sending signals, whereas, in pkill, you have an option of using a pattern, specifying process owner, etc.
26. whereis Command
The whereis command is used to locate the Binary, Sources, and Manual Pages of the command.
For example, to locate the Binary, Sources, and Manual Pages of the command ‘ls‘ and ‘kill‘.
whereis ls
whereis kill
The whereis command is useful to know where the binaries are installed for manual editing sometimes.
27. systemctl Command
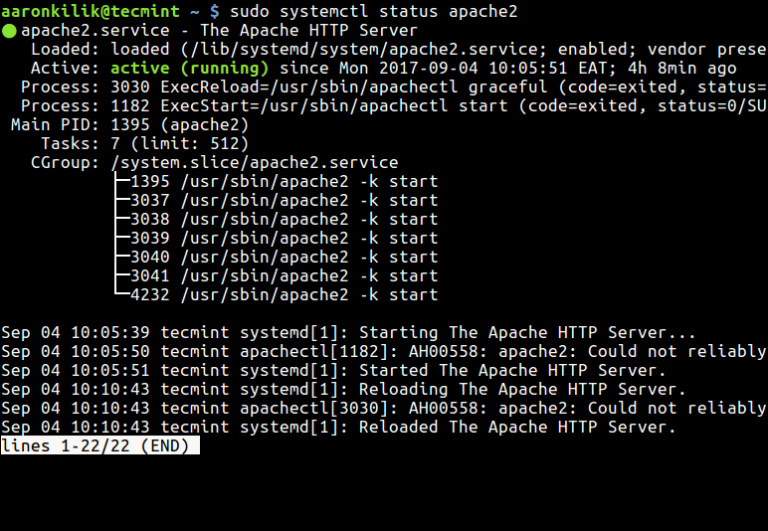
The systemctl command controls the starting, stopping, restarting, enabling, disabling, and checking of the status of a service or program.
sudo systemctl start sshd
sudo systemctl stop sshd
sudo systemctl restart sshd
sudo systemctl enable sshd
sudo systemctl disable sshd
sudo systemctl status sshd
28. alias Command
The alias command is a built-in shell command that lets you assign a name for a long command or frequently used command.
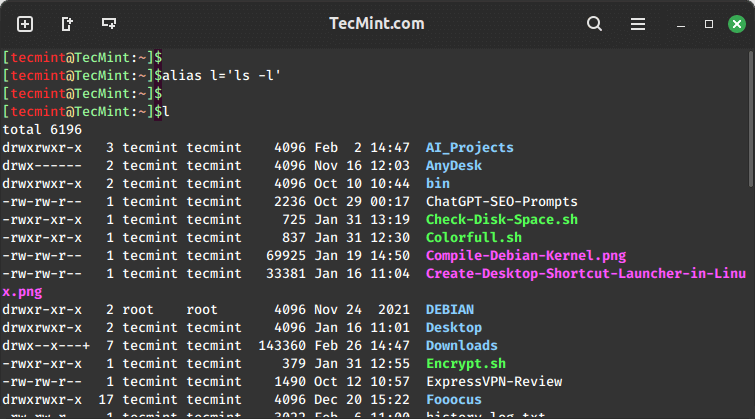
I frequently use the ‘ls -l’ command, which consists of 5 characters, including spaces. Therefore, I created an alias for it as 'l'.
alias l='ls -l'
check if it works or not.
l
To remove alias 'l', use the following ‘unalias‘ command.
unalias l
check, if ‘l‘ still is an alias or not.
l

l: command not found
Adding a bit of fun to Linux commands by creating aliases for specific important commands to other important commands.
alias cd='ls -l' (set alias of ls -l to cd)
alias su='pwd'   (set alias of pwd to su)
Now, imagine the humor when your friend types the cd command, expecting to change directories but instead gets a directory listing. Similarly, if he attempts ‘su‘, all he sees is the location of the working directory.
You can remove the alias later using the ‘unalias‘ command, as explained above.
29. df Command
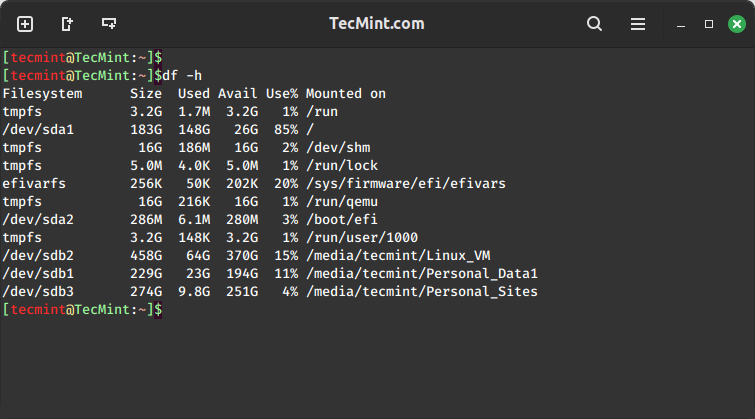
The df command is used to show the information about disk space usage on the file system. It shows the total, used, and available space on each mounted file system.
df -h
The -h option is used to print the disk space usage in a human-readable format, showing sizes in gigabytes (GB) and megabytes (MB) for each mounted file system on your system.
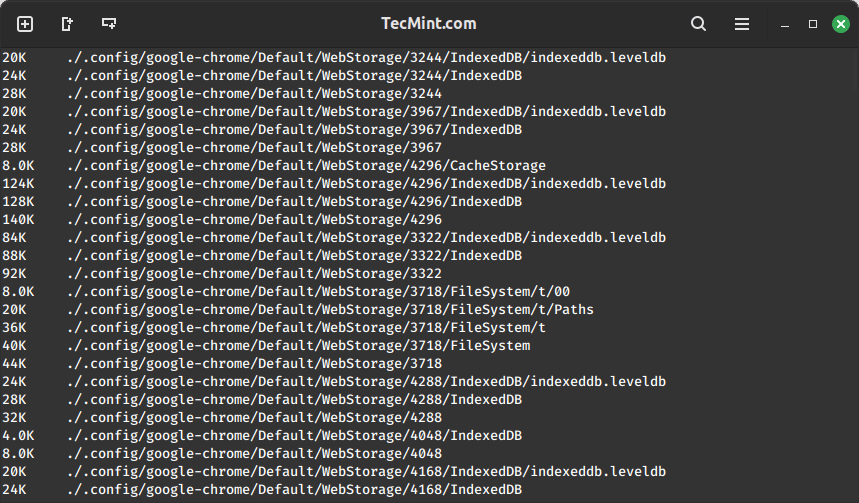
30. du Command
The du command is used to show the disk space usage of files and directories, which includes the total disk space occupied by a specific file or directory, including the space used by its subdirectories.
du -h
The -h option is used to print the file usage in a human-readable format, showing sizes in gigabytes (GB) and megabytes (MB).
31. Command: rm
The command ‘rm‘ stands for remove. rm is used to remove files (s) and directories.
Removing a directory
root@tecmint:~# rm PassportApplicationForm_Main_English_V1.0

rm: cannot remove `PassportApplicationForm_Main_English_V1.0': Is a directory
The directory can’t be removed simply by ‘rm‘ command, you have to use ‘-rf‘ switch along with ‘rm‘.
root@tecmint:~# rm -rf PassportApplicationForm_Main_English_V1.0
Warning: “rm -rf” command is a destructive command if accidently you make it to the wrong directory. Once you ‘rm -rf‘ a directory all the files and the directory itself is lost forever, all of a sudden. Use it with caution.
32. Command: echo
echo as the name suggest echoes a text on the standard output. It has nothing to do with shell, nor does shell reads the output of echo command. However in an interactive script, echo passes the message to the user through terminal. It is one of the command that is commonly used in scripting, interactive scripting.
root@tecmint:~# echo "Tecmint.com is a very good website"

Tecmint.com is a very good website
creating a small interactive script
1. create a file, named ‘interactive_shell.sh‘ on desktop. (Remember ‘.sh‘ extension is must).
2. copy and paste the below script, exactly same, as below.
#!/bin/bash
echo "Please enter your name:"
   read name
   echo "Welcome to Linux $name"
Next, set execute permission and run the script.
root@tecmint:~# chmod 777 interactive_shell.sh
root@tecmint:~# ./interactive_shell.sh

Please enter your name:
Ravi Saive
Welcome to Linux Ravi Saive
Note: ‘#!/bin/bash‘ tells the shell that it is an script an it is always a good idea to include it at the top of script. ‘read‘ reads the given input.
33. Command: passwd
This is an important command that is useful for changing own password in terminal. Obviously you need to know your current passowrd for Security reason.
root@tecmint:~# passwd

Changing password for tecmint.
(current) UNIX password: ********
Enter new UNIX password: ********
Retype new UNIX password: ********
Password unchanged   [Here was passowrd remians unchanged, i.e., new password=old password]
Enter new UNIX password: #####
Retype new UNIX password:#####
34. Command: lpr
This command print files named on command line, to named printer.
root@tecmint:~# lpr -P deskjet-4620-series 1-final.pdf
Note: The ‘lpq‘ command lets you view the status of a printer (whether it’s up or not), and the jobs (files) waiting to be printed.
35. Command: cmp
compare two files of any type and writes the results to the standard output. By default, ‘cmp‘ Returns 0 if the files are the same; if they differ, the byte and line number at which the first difference occurred is reported.
To provide examples for this command, lets consider two files:
file1.txt
root@tecmint:~# cat file1.txt

Hi My name is Tecmint
file2.txt
root@tecmint:~# cat file2.txt

Hi My name is tecmint [dot] com
Now, let’s compare two files and see output of the command.
root@tecmint:~# cmp file1.txt file2.txt

file1.txt file2.txt differ: byte 15, line 1
36. Command: wget
Wget is a free utility for non-interactive (i.e., can work in background) download of files from the Web. It supports HTTP, HTTPS, FTP protocols and HTTP proxies.
Download ffmpeg using wget
root@tecmint:~# wget http://downloads.sourceforge.net/project/ffmpeg-php/ffmpeg-php/0.6.0/ffmpeg-php-0.6.0.tbz2

--2013-05-22 18:54:52--  http://downloads.sourceforge.net/project/ffmpeg-php/ffmpeg-php/0.6.0/ffmpeg-php-0.6.0.tbz2
Resolving downloads.sourceforge.net (downloads.sourceforge.net)... 216.34.181.59
Connecting to downloads.sourceforge.net (downloads.sourceforge.net)|216.34.181.59|:80... connected.
HTTP request sent, awaiting response... 302 Found
Location: http://kaz.dl.sourceforge.net/project/ffmpeg-php/ffmpeg-php/0.6.0/ffmpeg-php-0.6.0.tbz2 [following]
--2013-05-22 18:54:54--  http://kaz.dl.sourceforge.net/project/ffmpeg-php/ffmpeg-php/0.6.0/ffmpeg-php-0.6.0.tbz2
Resolving kaz.dl.sourceforge.net (kaz.dl.sourceforge.net)... 92.46.53.163
Connecting to kaz.dl.sourceforge.net (kaz.dl.sourceforge.net)|92.46.53.163|:80... connected.
HTTP request sent, awaiting response... 200 OK
Length: 275557 (269K) [application/octet-stream]
Saving to: ‘ffmpeg-php-0.6.0.tbz2’

100%[===========================================================================>] 2,75,557    67.8KB/s   in 4.0s

2013-05-22 18:55:00 (67.8 KB/s) - ‘ffmpeg-php-0.6.0.tbz2’ saved [275557/275557]
37. Command: mount
Mount is an important command which is used to mount a filesystem that don’t mount itself. You need root permission to mount a device.
First run ‘lsblk‘ after plugging-in your filesystem and identify your device and note down you device assigned name.
root@tecmint:~# lsblk

NAME   MAJ:MIN RM   SIZE RO TYPE MOUNTPOINT
sda      8:0    0 931.5G  0 disk
├─sda1   8:1    0 923.6G  0 part /
├─sda2   8:2    0     1K  0 part
└─sda5   8:5    0   7.9G  0 part [SWAP]
sr0     11:0    1  1024M  0 rom
sdb      8:16   1   3.7G  0 disk
└─sdb1   8:17   1   3.7G  0 part
From this screen it was clear that I plugged in a 4 GB pendrive thus ‘sdb1‘ is my filesystem to be mounted. Become a root to perform this operation and change to /dev directory where all the file system is mounted.
root@tecmint:~# su
Password:
root@tecmint:~# cd /dev
Create a directory named anything but should be relevent for reference.
root@tecmint:~# mkdir usb
Now mount filesystem ‘sdb1‘ to directory ‘usb‘.
root@tecmint:~# mount /dev/sdb1 /dev/usb
Now you can navigate to /dev/usb from terminal or X-windows system and acess file from the mounted directory.
38. Command: gcc
gcc is the in-built compiler for ‘c‘ language in Linux Environment. A simple c program, save it on ur desktop as Hello.c (remember ‘.c‘ extension is must).
#include <stdio.h>
int main()
{
  printf("Hello worldn");
  return 0;
}
Compile it
root@tecmint:~# gcc Hello.c
Run it
root@tecmint:~# ./a.out

Hello world
Note: On compiling a c program the output is automatically generated to a new file “a.out” and everytime you compile a c program same file “a.out” gets modified. Hence it is a good advice to define a output file during compile and thus there is no risk of overwrite to output file.
Compile it this way
root@tecmint:~# gcc -o Hello Hello.c
Here ‘-o‘ sends the output to ‘Hello‘ file and not ‘a.out‘. Run it again.
root@tecmint:~# ./Hello

Hello world
39. Command: g++
g++ is the in-built compiler for ‘C++‘ , the first object oriented programming language. A simple c++ program, save it on ur desktop as Add.cpp (remember ‘.cpp‘ extension is must).
#include <iostream>

using namespace std;

int main()
    {
          int a;
          int b;
          cout<<"Enter first number:n";
          cin >> a;
          cout <<"Enter the second number:n";
          cin>> b;
          cin.ignore();
          int result = a + b;
          cout<<"Result is"<<"  "<<result<<endl;
          cin.get();
          return 0;
     }
Compile it
root@tecmint:~# g++ Add.cpp
Run it
root@tecmint:~# ./a.out

Enter first number:
...
...
Note: On compiling a c++ program the output is automatically generated to a new file “a.out” and everytime you compile a c++ program same file “a.out” gets modified. Hence it is a good advice to define a output file during compile and thus there is no risk of overwrite to output file.
Compile it this way
root@tecmint:~# g++ -o Add Add.cpp
Run it
root@tecmint:~# ./Add

Enter first number:
...
...
40. Command: java
Java is one of the world’s highly used programming language and is considered fast, secure, and reliable. Most of the the web based service of today runs on java.
Create a simple java program by pasting the below test to a file, named tecmint.java (remember ‘.java‘ extension is must).
class tecmint {
  public static void main(String[] arguments) {
    System.out.println("Tecmint ");
  }
}
compile it using javac
root@tecmint:~# javac tecmint.java
Run it
root@tecmint:~# java tecmint
Note: Almost every distribution comes packed with gcc compiler, major number of distros have inbuilt g++ and java compiler, while some may not have. You can apt or yum the required package.
Don’t forget to mention your valueable comment and the type of article you want to see here. I will soon be back with an interesting topic about the lesser known facts about Linux.

