NVM – Install and Manage Multiple Node.js Versions in Linux
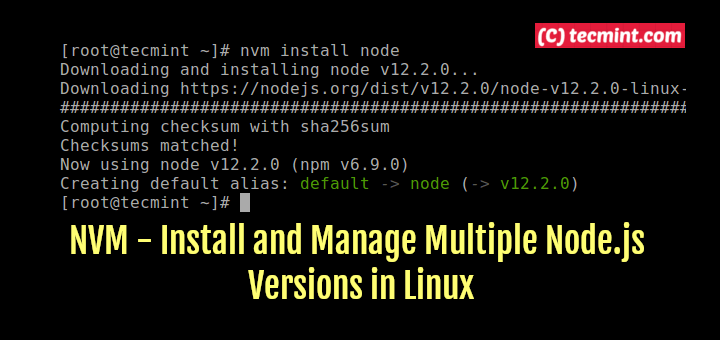
Node Version Manager (NVM in short) is a simple bash script to manage multiple active node.js versions on your Linux system. It allows you to install multiple node.js versions, and view all versions available for installation and all installed versions on your system.
Nvm also supports running of a specific node.js version and it can show the path to the executable to where it was installed, and much more.
In this article, we will explain how to install Node Version Manager (NVM) to manage multiple active node.js versions on your Linux distribution.
Installing NVM (Node Version Manager) in Linux
To install or update nvm on your Linux distribution, you can download the auto-install script using curl or wget command line tools as shown.
# curl -o- https://raw.githubusercontent.com/nvm-sh/nvm/v0.39.3/install.sh | bash
OR
# wget -qO- https://raw.githubusercontent.com/nvm-sh/nvm/v0.39.3/install.sh | bash
The above auto-install script clones the nvm repository to ~/.nvm in your home directory and add the required source commands to your shell startup scripts i.e ~/.bash_profile, ~/.zshrc, ~/.profile, or ~/.bashrc, depending on the shell program you are using as shown in the following output.
curl -o- https://raw.githubusercontent.com/nvm-sh/nvm/v0.39.3/install.sh | bash % Total % Received % Xferd Average Speed Time Time Time Current Dload Upload Total Spent Left Speed
100 15916 100 15916 0 0 34227 0 --:--:-- --:--:-- --:--:-- 34301
=> Downloading nvm from git to '/root/.nvm'
=> Cloning into '/root/.nvm'...
remote: Enumerating objects: 359, done.
remote: Counting objects: 100% (359/359), done.
remote: Compressing objects: 100% (305/305), done.
remote: Total 359 (delta 40), reused 168 (delta 28), pack-reused 0
Receiving objects: 100% (359/359), 219.46 KiB | 6.86 MiB/s, done.
Resolving deltas: 100% (40/40), done.
* (HEAD detached at FETCH_HEAD) master
=> Compressing and cleaning up git repository => Appending nvm source string to /root/.bashrc
=> Appending bash_completion source string to /root/.bashrc
=> You currently have modules installed globally with `npm`. These will no
=> longer be linked to the active version of Node when you install a new node
=> with `nvm`; and they may (depending on how you construct your `$PATH`)
=> override the binaries of modules installed with `nvm`:
...
Once the installation is complete, close your current terminal window and open a new one Or, simply source your shell profile file to load nvm. For example, if you are using bash, run the following command:
$ source ~/.bashrc
OR
$ source ~/.profile
Next, verify if the nvm has been installed on your system using the following command.
# command -v nvm nvm
It will show output as ‘nvm‘ if the installation was successful.
Install Multiple Node.js Versions Using NVM
Now it is time to learn how to use Node Version Manager in Linux. To download, compile, and install the latest release of node, run the following command:
# nvm install node
Note that in the above command, “node” is an alias for the latest version.
Downloading and installing node v20.0.0...
Downloading https://nodejs.org/dist/v20.0.0/node-v20.0.0-linux-x64.tar.xz...
########################################################################## 100.0%
Computing checksum with sha256sum
Checksums matched!
Now using node v20.0.0 (npm v9.6.4)
Creating default alias: default -> node (-> v20.0.0)
To install a specific “node” version, first list the available node versions and then install the version as shown.
# nvm ls-remote
# nvm install 19.0.0
Downloading and installing node v19.0.0...
Downloading https://nodejs.org/dist/v19.0.0/node-v19.0.0-linux-x64.tar.xz...
########################################################################## 100.0%
Computing checksum with sha256sum
Checksums matched!
Now using node v19.0.0 (npm v8.19.2)
Once you have installed a Node.js version using nvm, the system should now point to the Node.js and npm versions under nvm. You can check the location of the node and npm binary/command being used by running the which command as follows:
# which node
/root/.nvm/versions/node/v20.0.0/bin/node # which npm
/root/.nvm/versions/node/v20.0.0/bin/npm # node -v
v20.0.0 # npm -v
9.6.4
Listing Installed Node.js Versions
You can check all installed versions with the following command:
# nvm ls
-> v19.0.0 v20.0.0 system
default -> node (-> v20.0.0)
iojs -> N/A (default)
unstable -> N/A (default)
node -> stable (-> v20.0.0) (default)
stable -> 20.0 (-> v20.0.0) (default)
lts/* -> lts/hydrogen (-> N/A)
lts/argon -> v4.9.1 (-> N/A)
lts/boron -> v6.17.1 (-> N/A)
lts/carbon -> v8.17.0 (-> N/A)
lts/dubnium -> v10.24.1 (-> N/A)
lts/erbium -> v12.22.12 (-> N/A)
lts/fermium -> v14.21.3 (-> N/A)
lts/gallium -> v16.20.0 (-> N/A)
lts/hydrogen -> v18.16.0 (-> N/A)
Choose Node Version for a Project
This is where nvm becomes interesting. Now you can use nvm to choose the version of node.js to use for each project you are working on, based on requirements. Let’s see how to do this, as explained below.
Open multiple terminals and move into the project directories. For this guide, we have two projects under ~/projects/app-server and ~/projects/test-ui that require node version 19.0.0 and 20.0.0 deceptively.
------------ Project 1 ------------ $ cd ~/projects/api-server
$ nvm use 19.0.0
$ node -v ------------ Project 2 ------------
$ cd ~/projects/test-ui
$ nvm use 20.0.0
$ node -v
For example, if you have a global package installed when version 19.0.0 is active, when you switch to version 20.0.0, you need to reinstall the global package under the new version.
Importantly, you can view the path to the executable to where a specific node version was installed as follows:
# nvm which 20.0.0
# nvm which 19.0.0
# nvm which system #check system-installed version of a node using “system” alias
Set Default Node.js Version in Linux
Furthermore, to manually set a default node version to be used in any new shell, use the alias “default” as shown.
# nvm alias default 20.0.0
# nvm alias default system
# nvm alias default 19.0.0
.nvmrc initialization file in your project root directory (or any parent directory) and add a node version number or any other flags or usage options that nvm understands, in it. Then use some of the commands we have just looked at above to operate with the specified version in the file.Uninstalling Node.js Version in Linux
To uninstall or remove a version of Node.js, issue the following command (do not forget to replace 19.0.0 with the version number):
# nvm uninstall 19.0.0
Uninstalling NVM in Linux
To remove nvm manually from your system, run the following commands:
# rm -rf "$NVM_DIR"
OR
# rm -rf ~/.nvm
Next, edit ~/.bashrc (or the applicable shell profile config file, as listed above) and remove the following config lines:
export NVM_DIR="$HOME/.nvm"
[ -s "$NVM_DIR/nvm.sh" ] && . "$NVM_DIR/nvm.sh" # This loads nvm
[[ -r $NVM_DIR/bash_completion ]] && . $NVM_DIR/bash_completion
For more information, see nvm --help or go to the Node Version Manager Github repository: https://github.com/nvm-sh/nvm.
That’s all! Node Version Manager is a simple bash script to manage multiple active node.js versions on your Linux system. Use the feedback form below to ask questions or share your comments with us.

