
How to Install Cacti (Network Monitoring) Tool on Linux
The Cacti tool is an open-source, web-based solution for network monitoring and system graphing in IT businesses. Cacti allows users to poll services regularly to create graphs using RRDtool.
It’s typically used to graph time-series data for metrics like network bandwidth utilization, CPU load, running processes, disk space, and more.
In this how-to, we will demonstrate how to install and set up a comprehensive network monitoring application called Cacti using the Net-SNMP tool on RHEL-based distributions such as CentOS Stream, Fedora, Rocky, and Alma Linux, using the YUM and DNF package manager tools.
Cacti Required Packages
The Cacti required the following packages to be installed on your Linux operating system.
- Apache : A Web server to display network graphs created by PHP and RRDTool.
- MySQL : A Database server to store cacti information.
- PHP : A script module to create graphs using RRDTool.
- PHP-SNMP : A PHP extension for SNMP to access data.
- NET-SNMP : An SNMP (Simple Network Management Protocol) is used to manage the network.
- RRDTool : A database tool to manage and retrieve time series data like CPU load, Network Bandwidth, etc.
For demonstration purposes, we used Rocky Linux 9 to install the Cacti tool, but the same instructions work for all RHEL-based distributions.
Step 1: Install Required Packages in Linux
First, begin by updating your system’s package repository to ensure you have the latest versions of software packages available.
sudo dnf update
Next, install the necessary packages for Cacti and its dependencies using the following command.
sudo dnf install net-snmp-utils net-snmp-libs rrdtool php-mysqlnd php-snmp php-xml php-gd mariadb-server httpd

Step 2: Install Cacti Tool in Linux
To install Cacti, make sure that the EPEL repository is enabled on your system.
sudo yum install epel-release
Once the EPEL repository is enabled, you can install Cacti by running the following command.
sudo yum install cacti

Step 3: Secure MariaDB Database
To configure MySQL for Cacti, we must first secure the newly installed MySQL server and then create the Cacti database with the user “Cacti“. If your MySQL is already installed and secured, you don’t need to do this again.
sudo mysql_secure_installation
Follow the prompts to set up a root password, remove anonymous users, disallow remote root login, and remove the test database.

Step 4: Create Cacti Database
Log in to the MySQL server using the newly created password, and then create the Cacti database with the user “Cacti” setting a password for it.
sudo mysql -u root -p
CREATE DATABASE cacti;
CREATE USER 'cacti'@'localhost' IDENTIFIED BY 'your_password';
GRANT ALL PRIVILEGES ON cacti.* TO 'cacti'@'localhost';
FLUSH PRIVILEGES;
EXIT;

Next, you need to import the default Cacti database schema into the newly created database, but before that, you need to find out the database file path using the rpm command and import it as shown.
sudo rpm -ql cacti | grep cacti.sql
sudo mysql -u cactiuser -p cacti < /usr/share/doc/cacti/cacti.sql

Step 5: Configure Cacti Database Connection
To configure the Cacti database connection, you need to open the configuration file as shown.
sudo vi /etc/cacti/db.php
Update the following lines with your database information.
$database_type     = 'mysql';
$database_default  = 'cacti';
$database_hostname = 'localhost';
$database_username = 'cacti';
$database_password = 'your_password';

Step 6: Configure Apache for Cacti
Open a file called /etc/httpd/conf.d/cacti.conf with your choice of editor.
sudo vi /etc/httpd/conf.d/cacti.conf
Add the following lines to the file:
Alias /cacti /usr/share/cacti
<Directory /usr/share/cacti/>
    Options +FollowSymLinks
    AllowOverride None
    <IfModule mod_authz_core.c>
        # Apache 2.4
        Require all granted
    </IfModule>
    <IfModule !mod_authz_core.c>
        # Apache 2.2
        Order Deny,Allow
        Deny from all
        Allow from all
    </IfModule>
</Directory>
Save and close the file.
Finally, restart the Apache and MariaDB services to apply the changes.
sudo systemctl restart httpd
sudo systemctl restart mariadb
Step 7: Configure Cacti Cron Job
Now open the crontab file to schedule polling intervals for Cacti.
sudo vi /etc/cron.d/cacti
Remove the comment from the following line. The poller.php script runs every 5 minutes to gather data from known hosts, which Cacti uses to create graphs.
*/5 * * * * cacti /usr/bin/php /usr/share/cacti/poller.php > /dev/null 2>&1
Step 8: Access Cacti Web Interface
To access the Cacti web interface, you need to open port 80 on the firewall to allow inbound traffic on that port.
sudo firewall-cmd --zone=public --add-port=80/tcp --permanent
sudo firewall-cmd --reload
You can now access Cacti via a web browser using the server’s IP address or domain name as shown.
http://your_server_ip/cacti
OR
http://domain.com/cacti
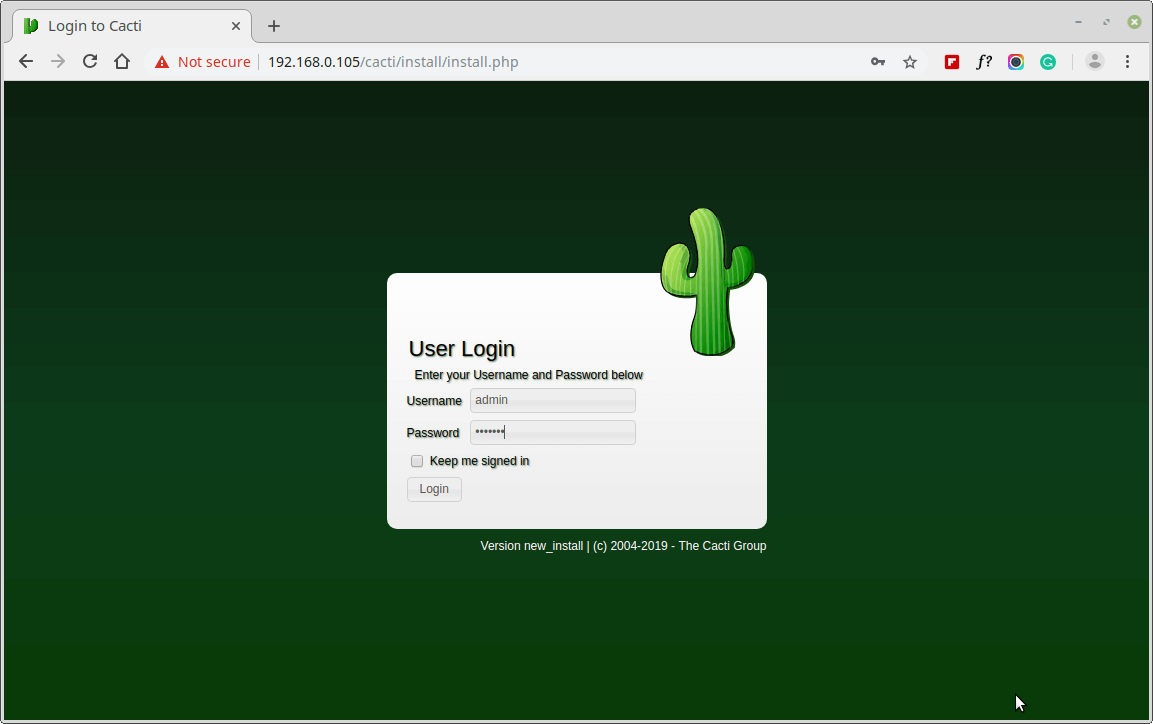
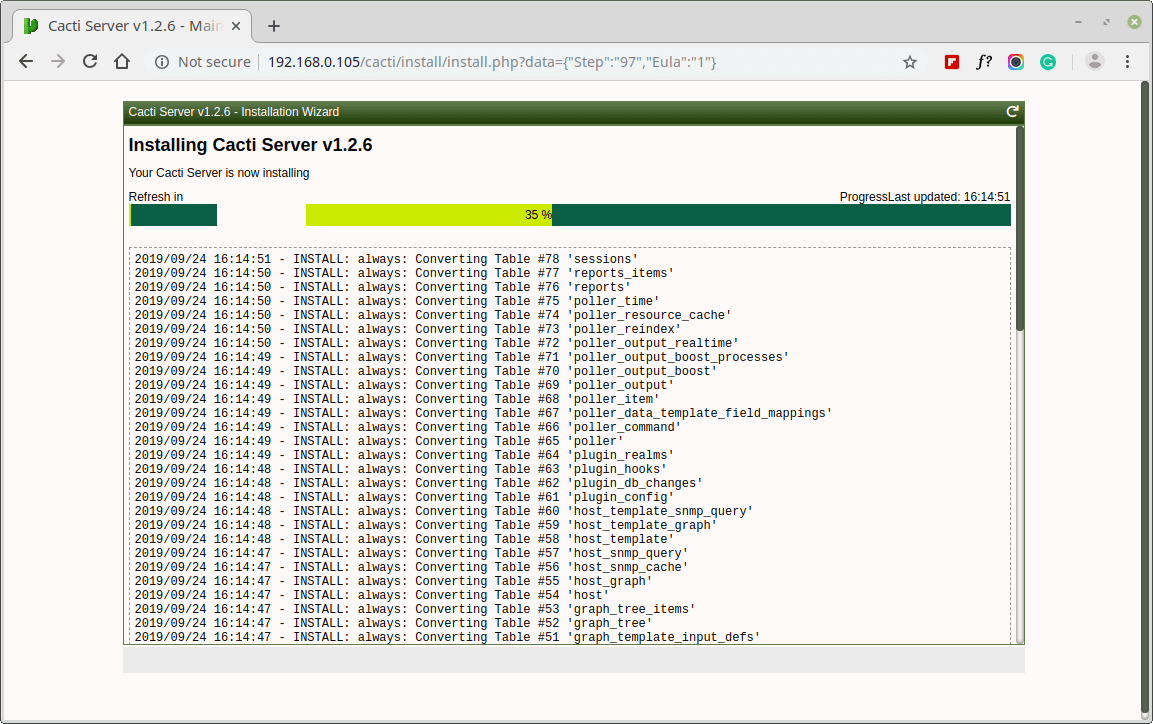
Now, follow the on-screen instructions to complete the installation process
User: admin
Password: admin
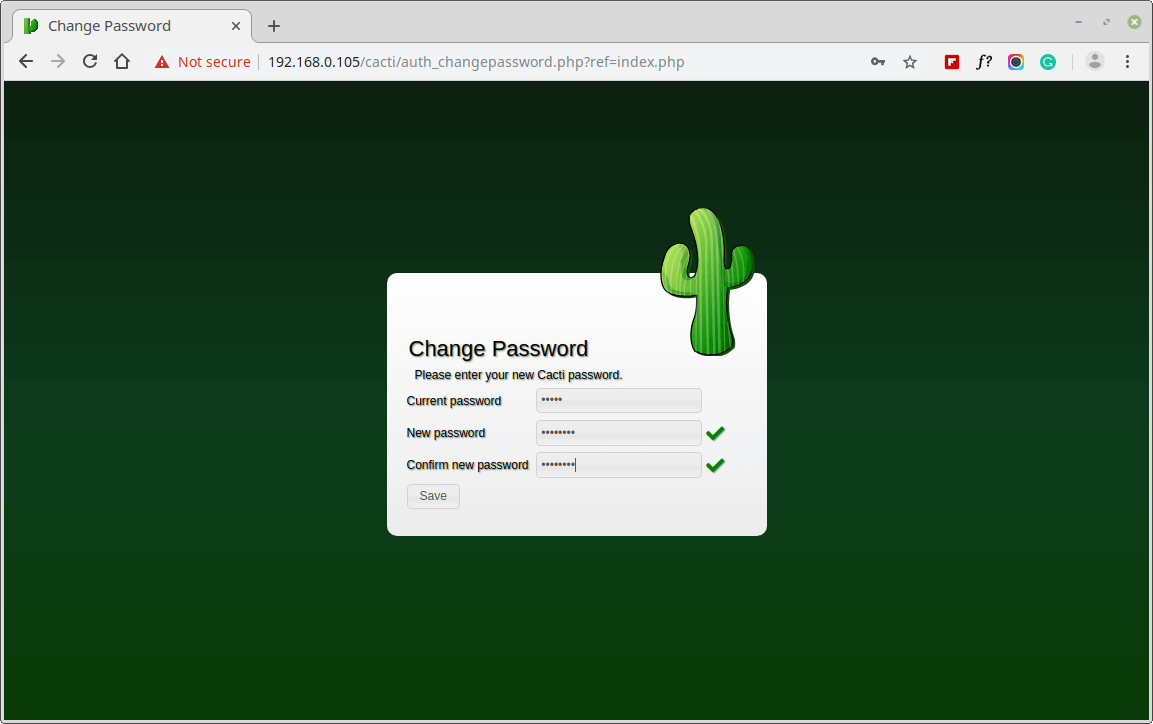
Next, change the default Cacti password.
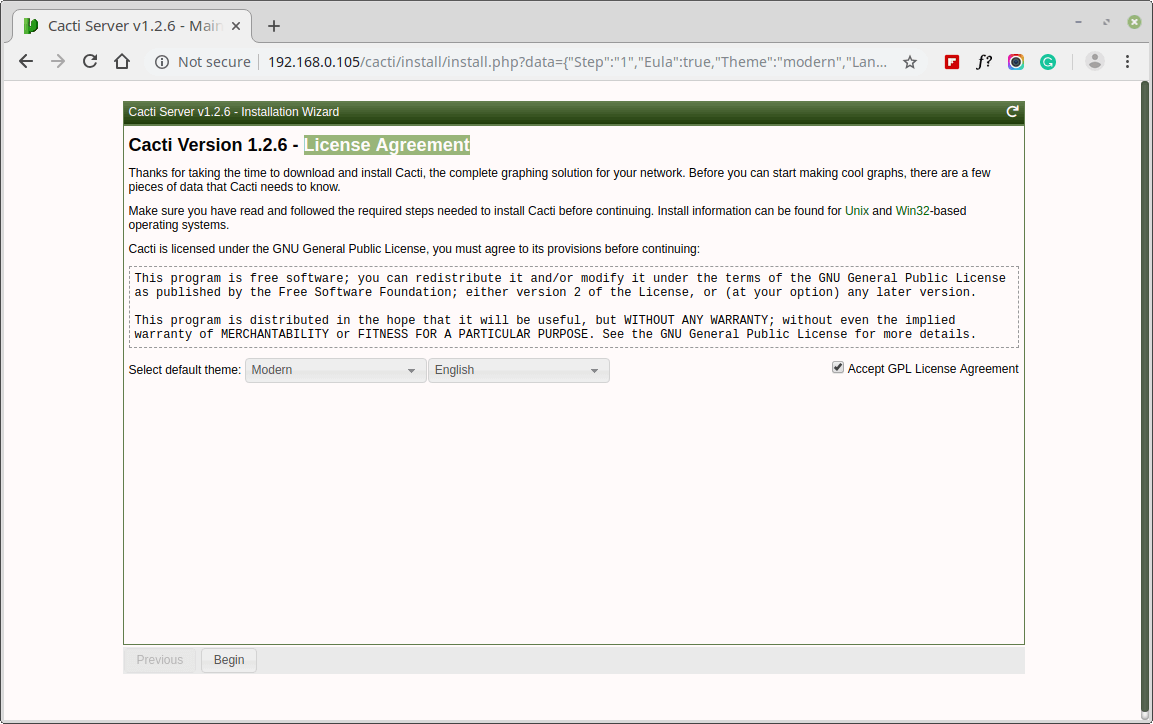
Accept Cacti License Agreement.
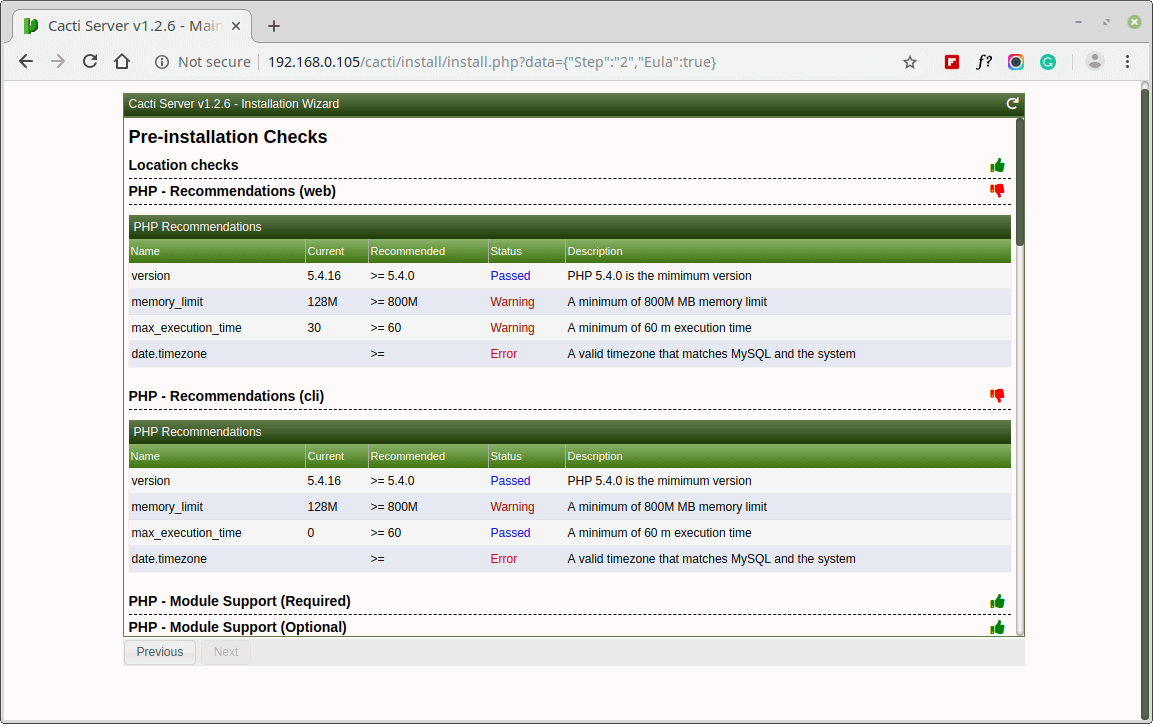
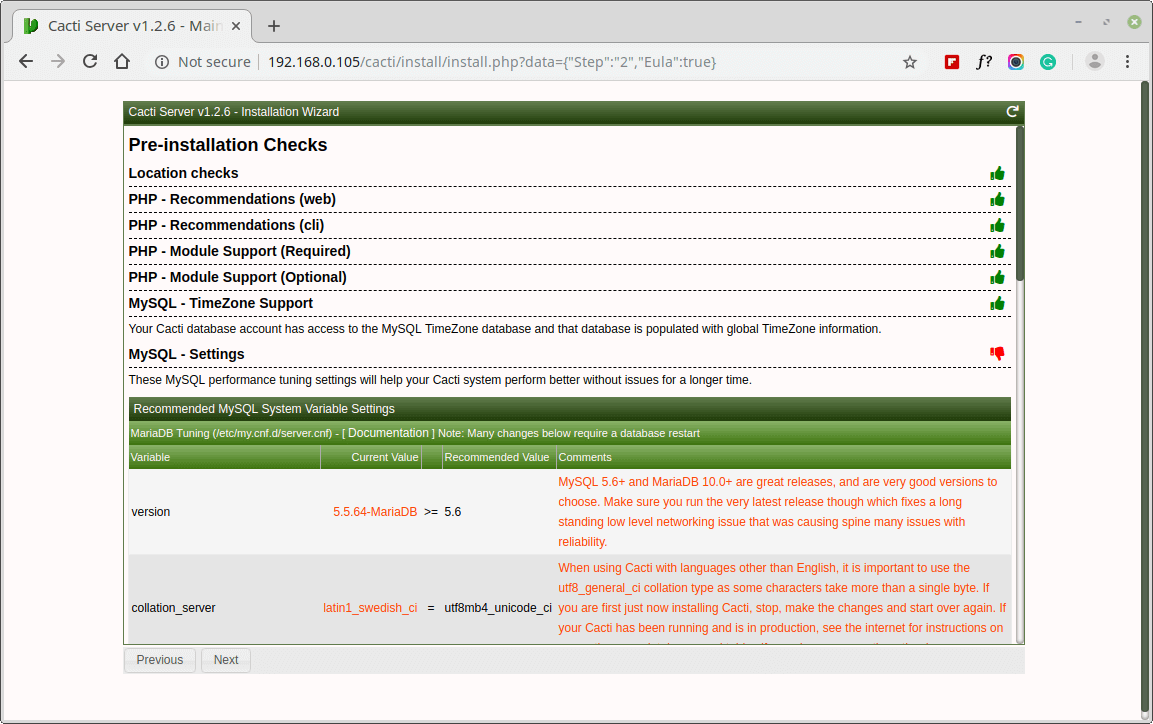
Next, the screen shows Pre-installation Checks for Cacti installation, please correct the suggested settings in your /etc/php.ini file as shown and restart Apache after making changes.
memory_limit = 800M
max_execution_time = 60
date.timezone = Asia/Kolkata
Similarly, you also need to grant access to the MySQL TimeZone database for user Cacti, so that the database is populated with global TimeZone information.
mysql> use mysql;
mysql> GRANT SELECT ON mysql.time_zone_name TO cacti@localhost;
mysql> flush privileges;
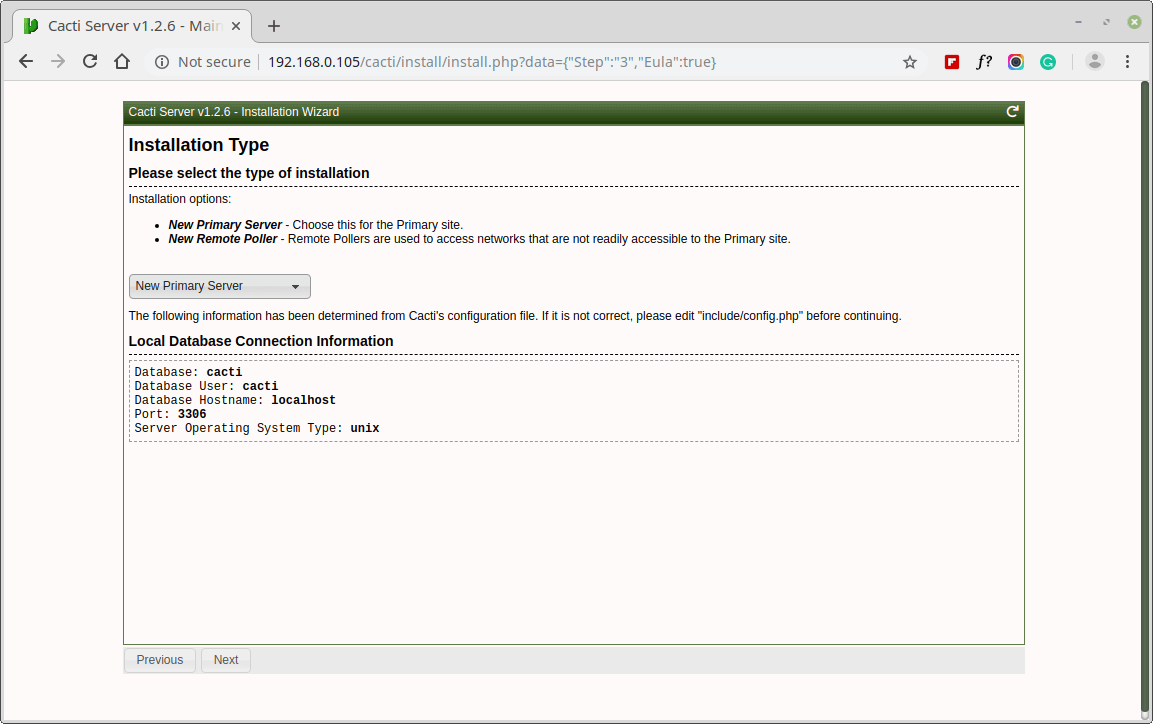
Please choose the installation Type as “New Install“.
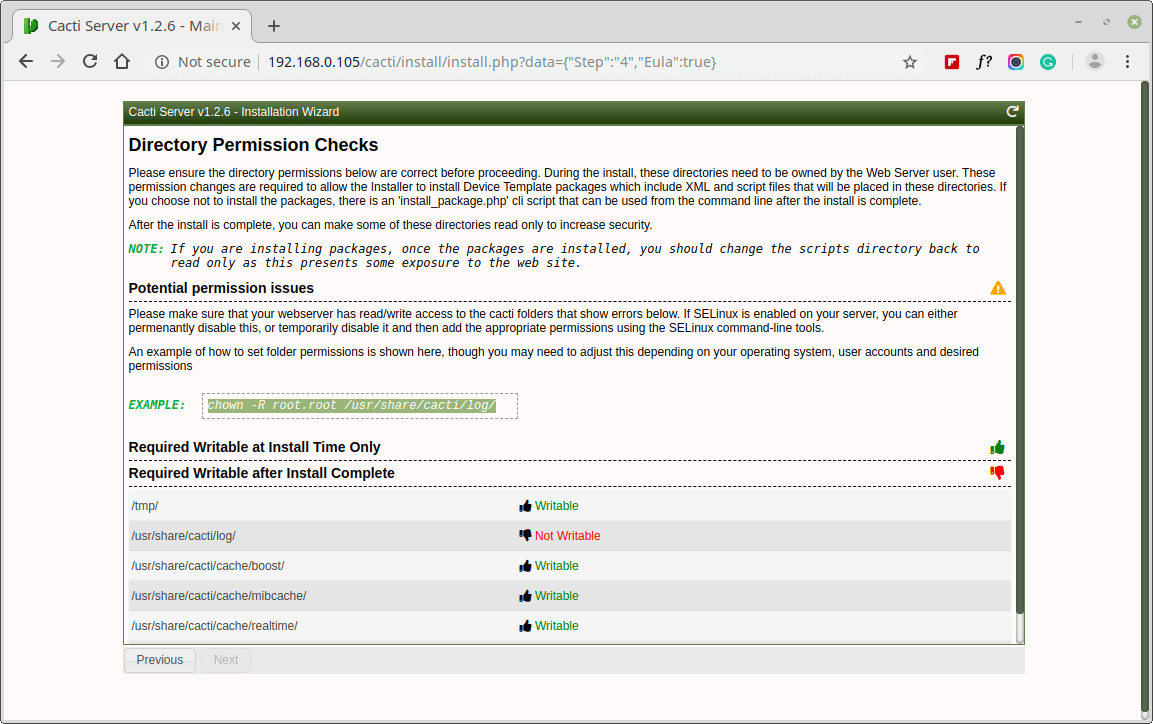
Make sure all the following directory permissions are correct before continuing.
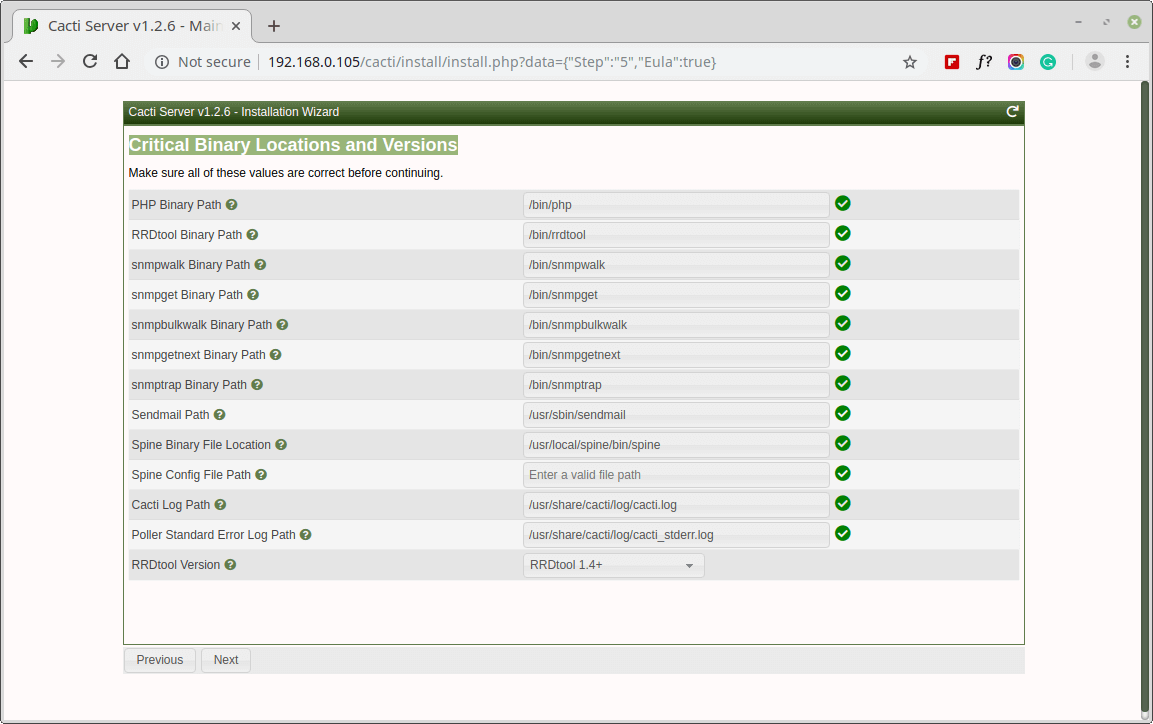
Make sure all of these Critical Binary Locations and Versions values are correct before continuing.
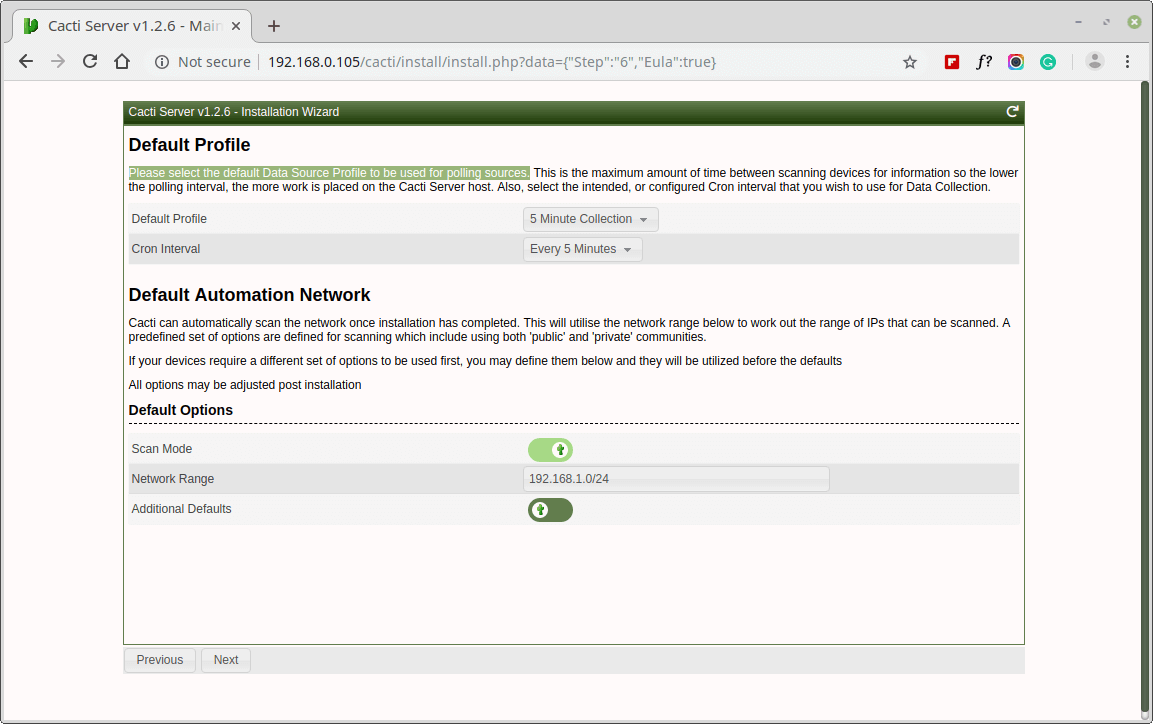
Please choose the default Data Source Profile to be used for polling sources.
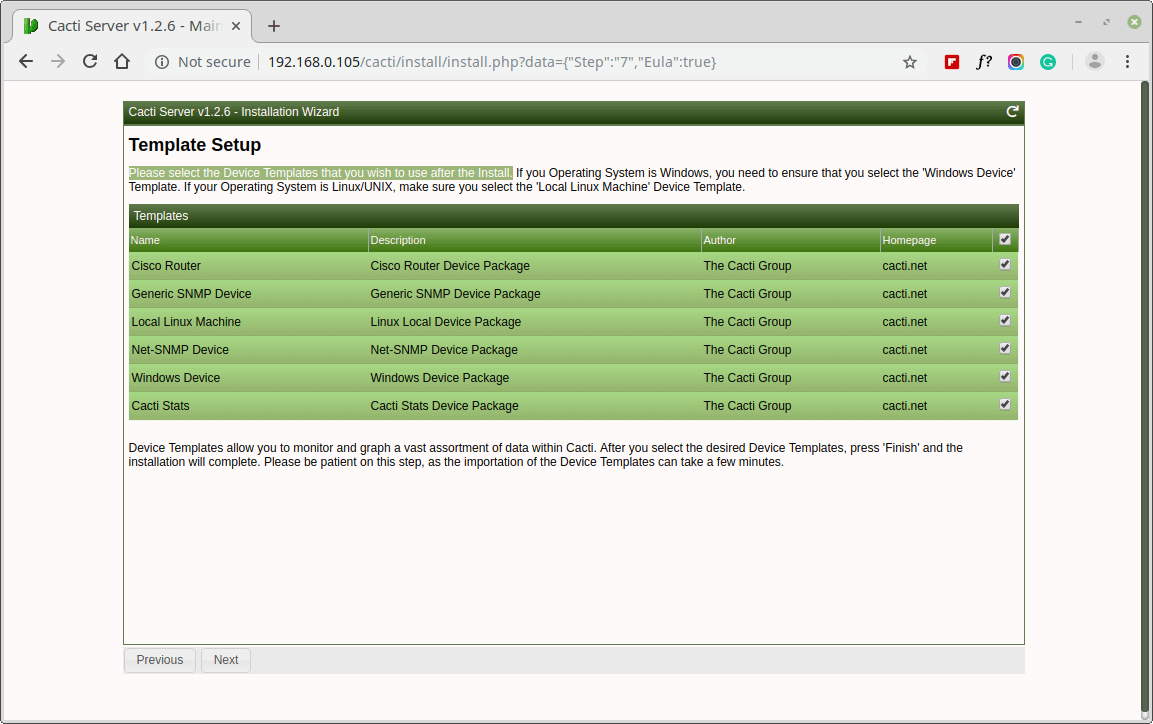
Please, choose the Device Templates that you wish to use after the Cacti Install.
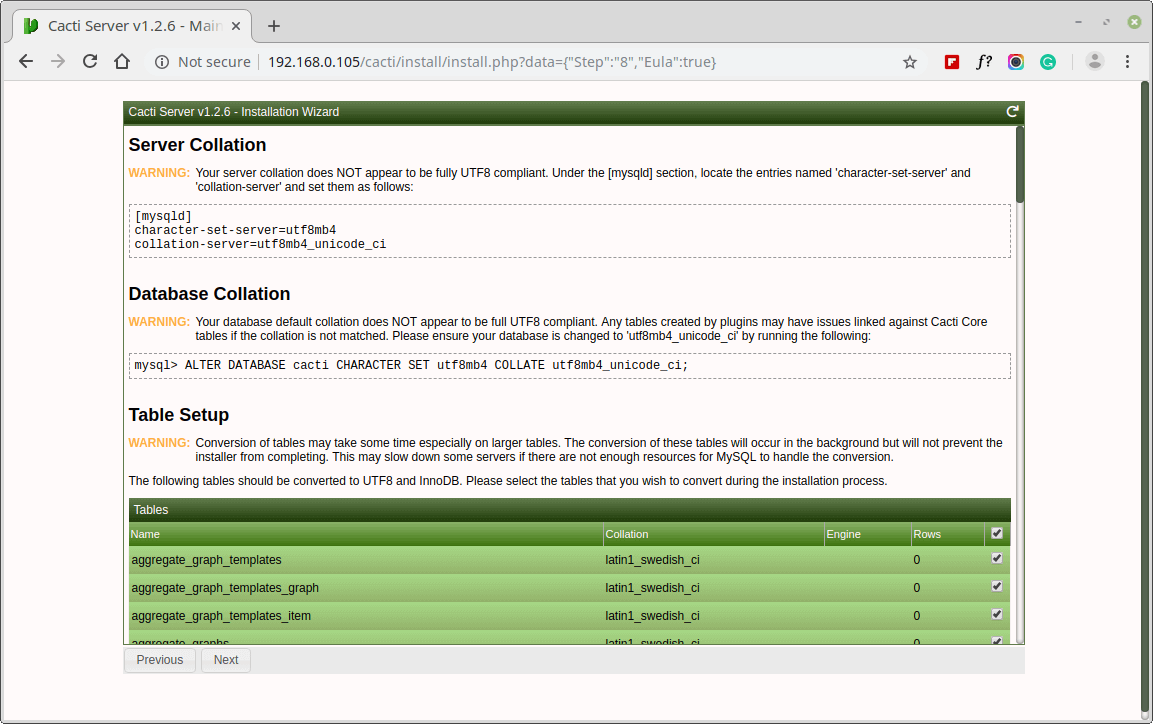
Set the Server Collation in your MySQL configuration file /etc/my.cnf under the [mysqld] section as shown.
[mysqld]
character-set-server=utf8mb4
collation-server=utf8mb4_unicode_ci
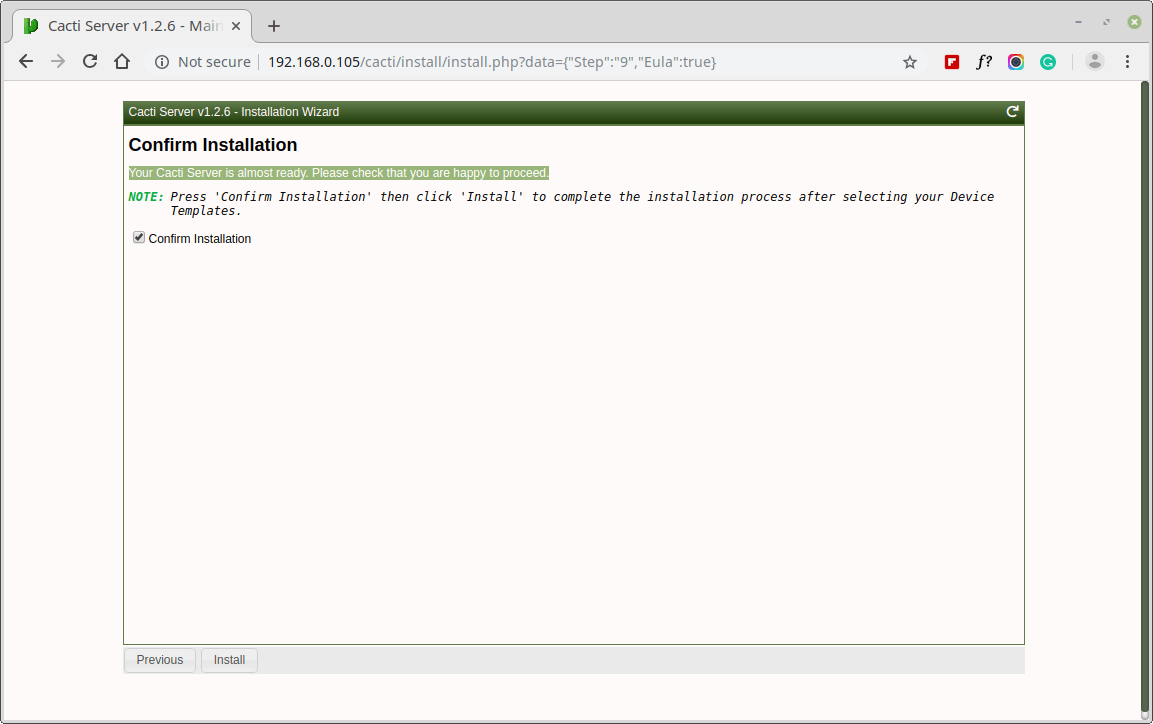
Your Cacti Server is almost ready. Please confirm that you are happy to proceed.
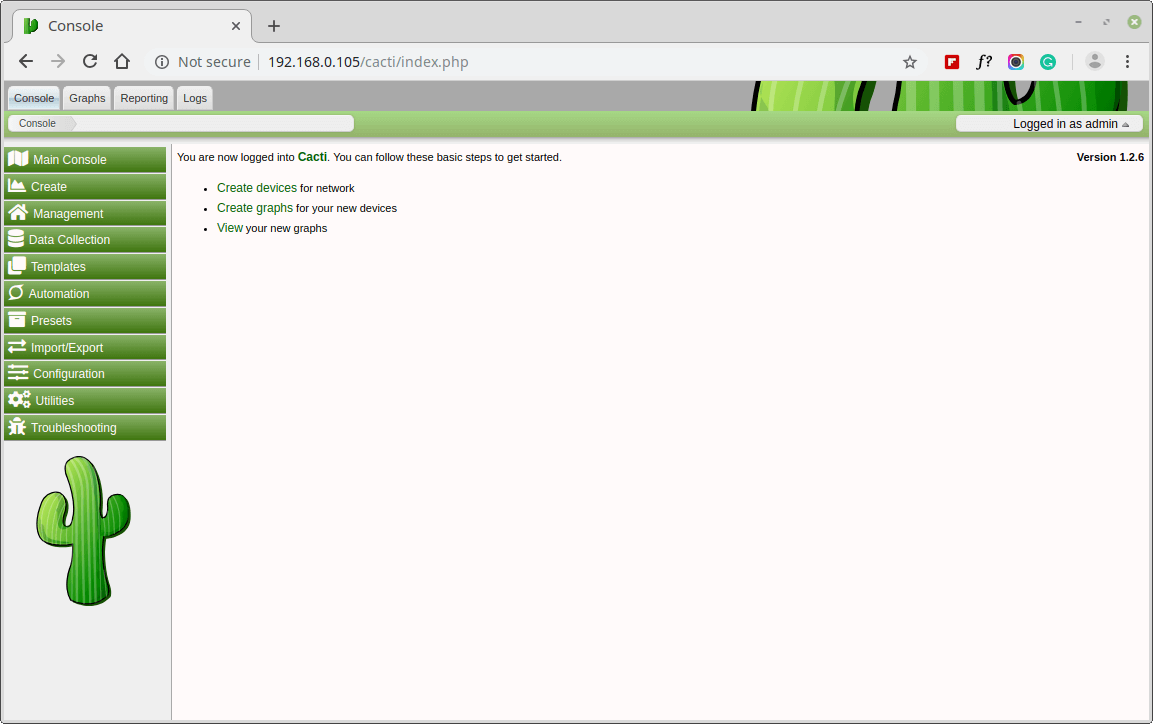
Congratulations! You have successfully installed Cacti on RHEL-based systems. You can now start monitoring your network infrastructure by adding devices, creating graphs, and setting up alerts within the Cacti web interface.


