How to Install Chrony to Synchronize Time in RHEL Systems
NTP (Network Time Protocol) is a protocol that runs over port 123 UDP at the transport layer and allows computers to synchronize time over networks for an accurate system time.
While time passes by, the computer’s internal clocks tend to drift which can lead to inconsistent time issues, especially on servers and client’s logs files or if you want to replicate servers’ resources or databases.
This tutorial will demonstrate how you can install and configure NTP (chrony) server on RHEL-based distribution to automatically synchronize time with the closest geographical peers available for your server location by using the NTP Public Pool Time Servers list.
How to Install Chrony in Linux
Chrony is an implementation of the Network Time Protocol (NTP), which is used to synchronize the system clocks across a network of computers to a high degree of accuracy.
Chrony is specifically designed to address some limitations and challenges associated with other NTP implementations. It is the default NTP implementation in many Linux distributions, including Red Hat Enterprise Linux (RHEL) 8.
To install Chrony, use the following dnf or yum command.
sudo dnf install chrony
OR
sudo yum install chrony
After the server is installed, first go to the official NTP Public Pool Time Servers, choose your Continent area where the server physically is located, then search for your Country location and a list of NTP servers should appear.
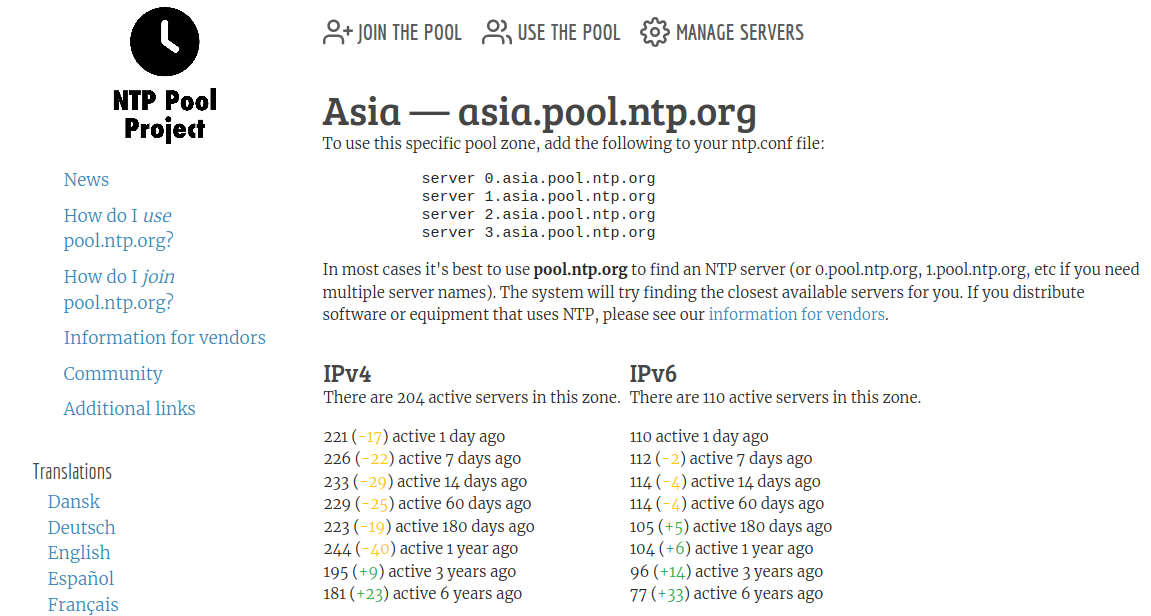
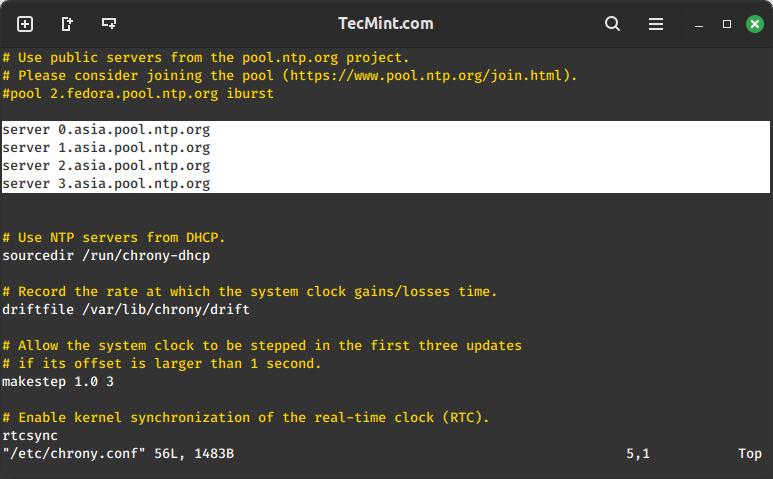
Then open the NTP daemon main configuration file (/etc/chrony.conf) for editing, comment on the default list of Public Servers from the pool.ntp.org project and replace it with the list provided for your country like in the screenshot below.
$ sudo vi /etc/chrony.conf
Further, you need to allow clients from your networks to synchronize time with this server. To accomplish this, add the following line to the NTP configuration file, where restrict statement controls, what network is allowed to query and sync time – replace network IPs accordingly.
restrict 192.168.1.0 netmask 255.255.255.0 nomodify notrap
The nomodify notrap statements suggest that your clients are not allowed to configure the server or be used as peers for time sync.
If you need additional information for troubleshooting in case there are problems with your NTP daemon add a log file statement which will record all NTP server issues into one dedicated log file /var/log/chrony.
Allow Chrony in the Firewall
NTP service uses UDP port 123 on the OSI transport layer (layer 4), which is designed particularly to resist the effects of variable latency (jitter).
If the firewall is enabled, allow Chrony to communicate through it:
sudo firewall-cmd --add-service=ntp --permanent
sudo firewall-cmd --reload
After you have opened firewall port 123, restart the Chrony server and make sure you enable it system-wide.
sudo systemctl restart chronyd
sudo systemctl enable chronyd
sudo systemctl status chronyd
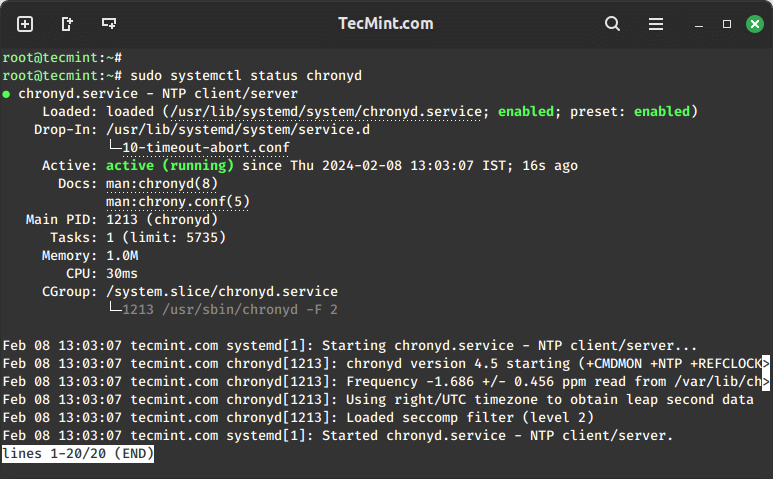
Check Time Synchronization with NTP
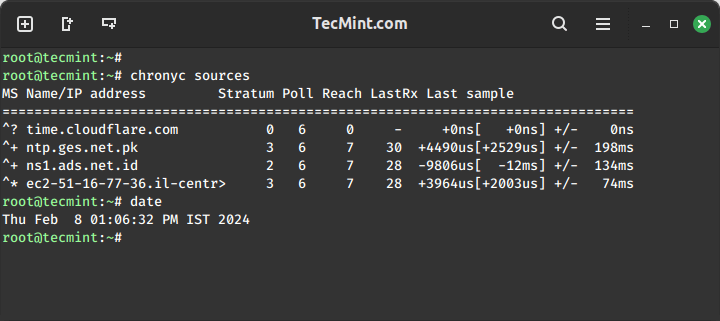
After the NTP daemon has been started, wait a few minutes for the server to synchronize time with its pool list servers, then run the following commands to verify the NTP peers’ synchronization status and your system time.
chronyc sources
That’s all! setting up a local NTP chrony on your network ensures that all your servers and clients have the same time set in case of an Internet connectivity failure and they all are synchronized with each other.


