How to Install Git and Create a Git Repository
If you have spent any amount of time recently in the Linux world, then chances are that you have heard of GIT, which is a distributed version control system that was created by Linus Torvalds, the mastermind of Linux itself.
It was designed to be a superior version control system to those readily available, the two most common of these being CVS and Subversion (SVN).
Whereas CVS and SVN use the Client/Server model for their systems, GIT operates a little differently. Instead of downloading a project, making changes, and uploading it back to the server, GIT makes the local machine act as a server.
In other words, you download the project with everything, the source files, version changes, and individual file changes right to the local machine, when you check in, check out, and perform all of the other version control activities. Once you are finished, you then merge the project back to the repository.
This model provides many advantages, the most obvious being that if you are disconnected from your central server for whatever reason, you still have access to your project.
In this tutorial, we will install Git, create a repository, and upload it to GitHub. To do this, you’ll need to visit http://www.github.com, create an account, and set up a repository if you want to upload your project there.
How to Install GIT in Linux
On Debian-based distributions such as Ubuntu and Linux Mint, if it is not already installed, you can install it using the apt command.
sudo apt install git
On RHEL-based distributions such as Fedora, CentOS Stream, Rocky, and Alma Linux, you can install it using yum or dnf command.
sudo yum install git
OR
sudo dnf install git
If you prefer to install and compile the git form source, you can follow the below commands.
wget https://www.kernel.org/pub/software/scm/git/git-2.43.0.tar.gz
tar xvjf git-2.43.0.tar.gz
cd git-*
./configure
make
sudo make install
How to Create a Git Project
Now that GIT is installed, let’s set it up. In your home directory, there will be a file called “~/.gitconfig“. This holds all of your repository info. Let’s give it your name and your email:
git config --global user.name "Your Name"
git config --global user.email [email protected]
Now, let’s create our first repository. You can turn any directory into a Git repository. Change the directory to one that contains some source files and follow these steps.
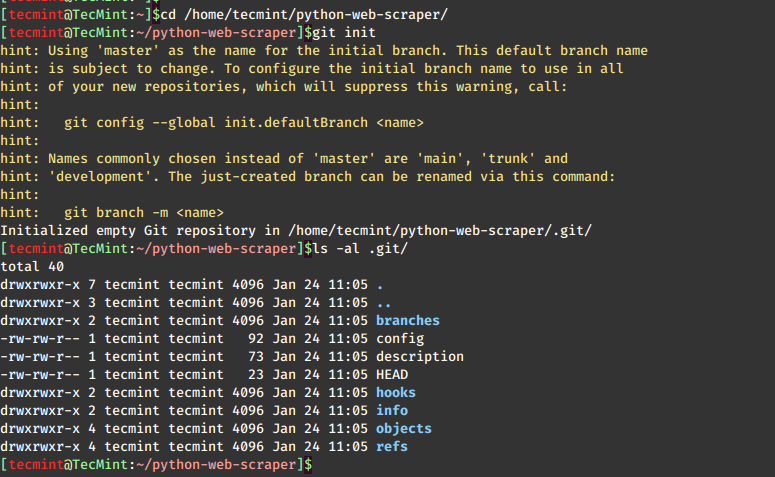
cd /home/tecmint/python-web-scraper/
git init
In that directory, a new hidden directory has been created called “.git“. This directory is where GIT stores all of its information about your project, and any changes that you make to it.
ls -al .git/

If at any time you no longer wish for any directory to be a part of a GIT repository, you just delete this directory using the rm command.
rm –rf .git
Now that we have a repository created, we need to add some files to the project. You can add any type of file to your GIT project, but for now, let’s generate a “README.md” file that gives a little info about your project (also shows up in the README block at GitHub) and add some source files.
vi README.md
Enter info about your project, save, and exit.
With the two below commands, we have added the “README.md” file to your GIT project, and then we added all Python source (*.py) files in the current directory.
git add README.md
git add *.py
Worth noting is that 99 times out of 100 when you are working on a GIT project, you are going to be adding all of the files in the directory.
You can do so like this:
git add .
Now we are ready to commit the project to a stage, meaning that this is a marker point in the project. You do this with the git commit “–m” command where the “–m” option specifies a message you want to give it. Since this is the first commit of our project, we will enter “first commit” as our “–m” string.
git commit -m 'first commit'
How to Upload Project to GitHub Repository
We are now ready to push your project up to GitHub. You will need the login information you made when creating your account. We are going to take this information and pass it to GIT so it knows where to go. You’ll want to replace ‘user’ and ‘project.git’ with the proper values.
git remote add origin [email protected]:ravisaive/project.git
Now, it is time to push, i.e. copy from your repository to the remote repository. The git push command takes two arguments: the “remotename” and the “branchname”. These two names are usually Origin and Master, respectively:
git push origin master
That’s it! Now you can go to the https://github.com/username/repo link to see your git project.


