How to Install Docker on Ubuntu
Using Docker means opening a new realm of computing but if you are just getting started with Docker, the installation may seem a huge task.
There are two recommended ways of installing Docker on Ubuntu:
- Installing Docker from Ubuntu’s repository: Easy, single line command but gives a little old version
- Using Docker’s official repository: Slightly more work but gives the most recent stable release
And I will be discussing both of them in this tutorial.
Method 1: Install Docker using Ubuntu’s repository
If you don’t care about having a little older version and don’t want to get into setting and managing repositories, then this is the best method for you.
Start with updating the repository index:
sudo apt update Now, you can use the following command to install Docker as well as Docker Compose in Ubuntu:
sudo apt install docker.io docker-compose📋
The Docker package is named docker.io because there existed a transitional package named docker (for docklet applications) even before Docker came into existence. For this reason, the Docker package had to be named something else.
Once you are done with the installation, you can check the installed version using the following command:
docker -v
As you can see, it gave me Docker version 24.0.5.
Method 2: Install the latest stable version of Docker in Ubuntu
If you want the most recent stable version of Docker, then you can install Docker from their official repository.
Step 1: Remove any existing Docker packages
But before you jump to the installation part, it is necessary to remove any old installation of Docker.
To uninstall the old Docker installation, use the following command.
sudo apt remove docker.io docker-doc docker-compose docker-compose-v2 podman-docker containerd runcStep 2: Install dependencies
The first step is to install some essential packages which will be used to install Docker later in this tutorial:
sudo apt install ca-certificates curl gnupg lsb-releaseYou may already have some or all of these packages installed but no harm in ensuring that. The above command won’t harm you.
Step 3: Add GPG key of Docker repository and add it to sources.list
Now, create a directory with special permissions suitable for storing cryptographic keyrings by the apt package manager for package verification:
sudo install -m 0755 -d /etc/apt/keyringsNext, use the curl command as shown below to download and import GPG keyring for Docker:
curl -fsSL https://download.docker.com/linux/ubuntu/gpg | sudo gpg --dearmor -o /etc/apt/keyrings/docker.gpgAfter downloading the GPG keyring, change the file permissions using the chmod command so every user on the system can read the GPG keyring:
sudo chmod a+r /etc/apt/keyrings/docker.gpgFinally, add the Docker repository to the sources.list.d file:
echo
  "deb [arch=$(dpkg --print-architecture) signed-by=/etc/apt/keyrings/docker.gpg] https://download.docker.com/linux/ubuntu
  $(. /etc/os-release && echo "$VERSION_CODENAME") stable" |
  sudo tee /etc/apt/sources.list.d/docker.list > /dev/null
That’s it!
Step 4: Installing Docker and Docker Compose
Now, to take effect from the changes you’ve made to the system, update the system repository:
sudo apt updateGrab the latest version of Docker along with other Docker components and dependencies using the following command:
sudo apt install docker-ce docker-ce-cli containerd.io docker-buildx-plugin docker-compose-plugin📋
While the docker.io package installs most of the necessary Docker components, you’ll need to do it individually here.
To check the installed version, use the following command:
docker -v
Another great way to test the installation is to use the Hello World image in Docker.
Lemme show you how to do it.
Use a hello-world image to verify the Docker installation
Running a Hello World program is a standard practice that we all follow to kick-start any programming journey and the same goes for Docker.
Docker provides you with a Hello World image that you can use to test the installation.
To install and run the Hello World image, simply use the following:
sudo docker run hello-world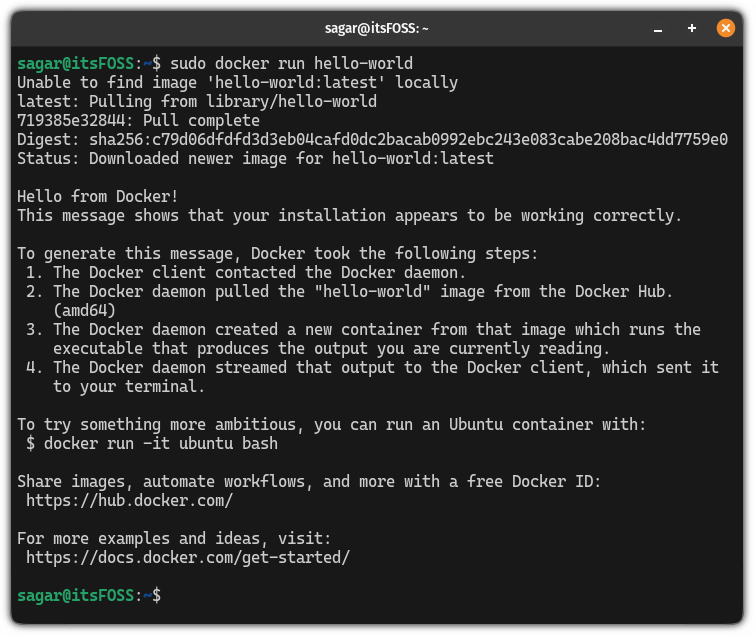
Some users may get an error while executing the above command saying “Cannot connect to the Docker daemon”:

In that case, reboot your system and try again to install the Docker Hello World image and it’ll work just fine.
💡Bonus Tip: Use docker without sudo in Ubuntu
If you noticed, I used sudo to pull the docker image which is not the most convenient way to use the Docker.
If you try to use Docker without sudo, it will give you an error:

Well, in this section, I will show you how you can use Docker without sudo.
📋
To perform the shown steps, superuser privileges are a must!
The first step is to create a new group named Docker using the following:
sudo groupadd dockerOnce done, add the user to the Docker group using the following:
sudo usermod -aG docker <username>🚧
Make sure you only mention the user who has super-user privileges.
Now, log out and log back in to take effect from the changes. But if you are using a VM then reboot is a must.
That’s it! From now on, you can use the docker commands without sudo like I did to run the Docker Hello World image:
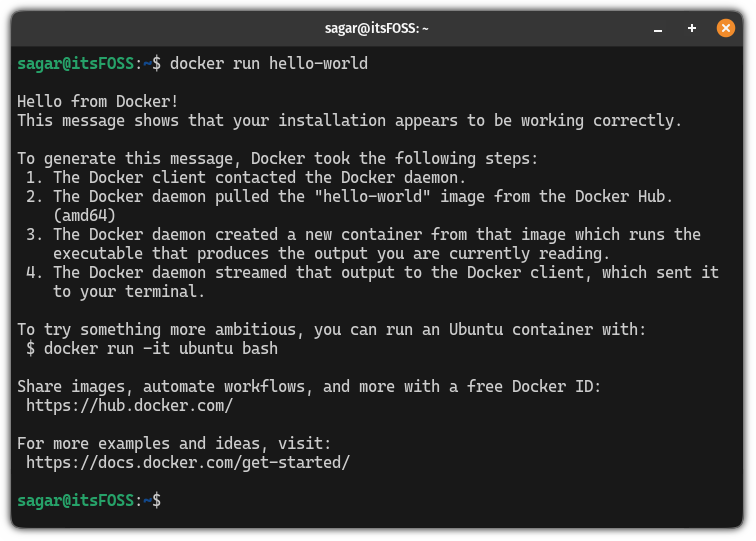
There you go.
Here’s what to do after installing Docker
If you are just getting started, then refer to the list of essential Docker commands that every user must know:
I hope you will find this helpful.


