7 Things You Never Knew You Could Do in GNOME’s Activity Search
In an earlier article, I shared tips for mastering search in the Nautilus file manager.
In this tutorial, I’ll tell you many of the ignored search features in the GNOME Activity area.
If you are not aware of the technical term ‘GNOME Activities’, you can access it by clicking the Activities button in the top left corner in the GNOME desktop environment,

You can also press the Super key (Windows key) to get the same.
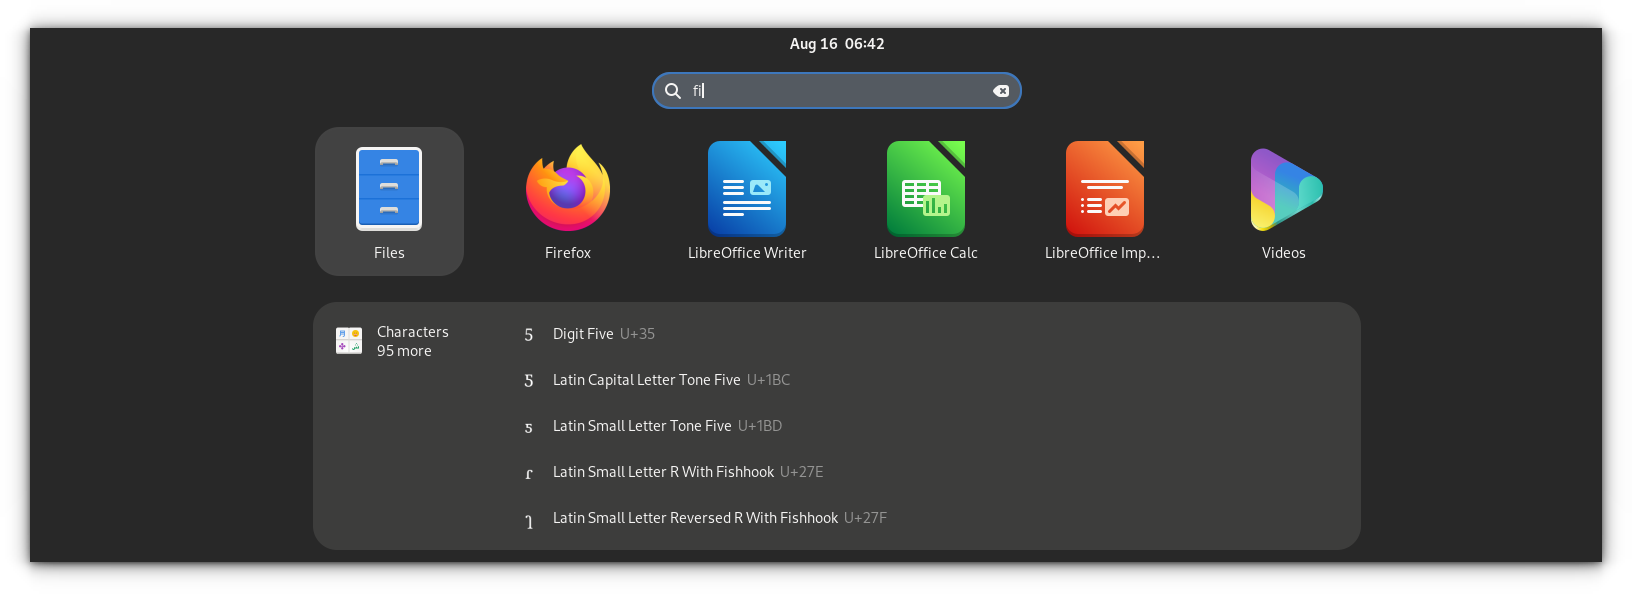
Yes. GNOME has quite a powerful built-in search feature and yet many people use it to search for applications and run them.

But it has several more features that may come in handy and make you feel like a pro user.
Let’s see them one by one.
1. Desktop wide file search
This is similar to opening apps. When you start typing something in the search area, you can see things changing continually. If some file is matched with your query, you can open it using the default application, by clicking on the name of the file, or pressing Enter.
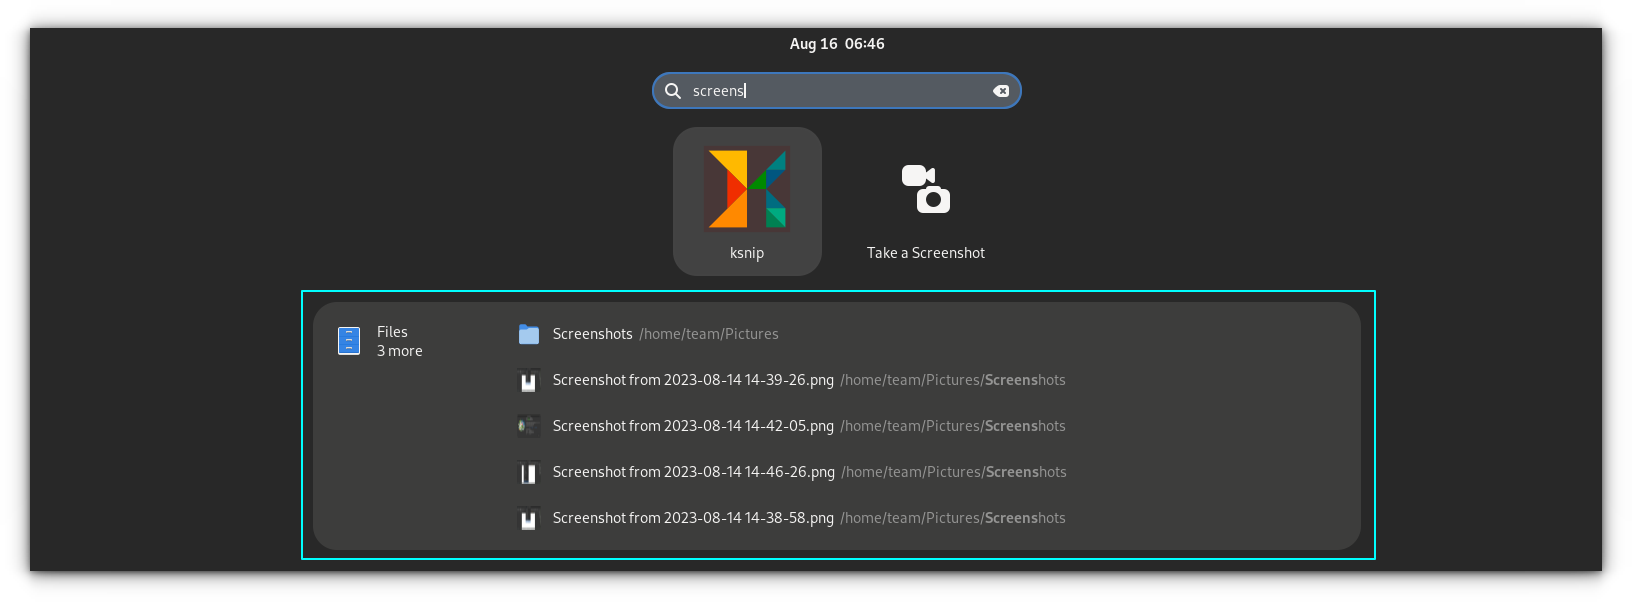
On the same interface, you can see that there is a small preview for each file. Also, each file listed here is associated with its absolute location.
If you look closely, you can also find the file manager icon here. Now, click on the file manager icon.
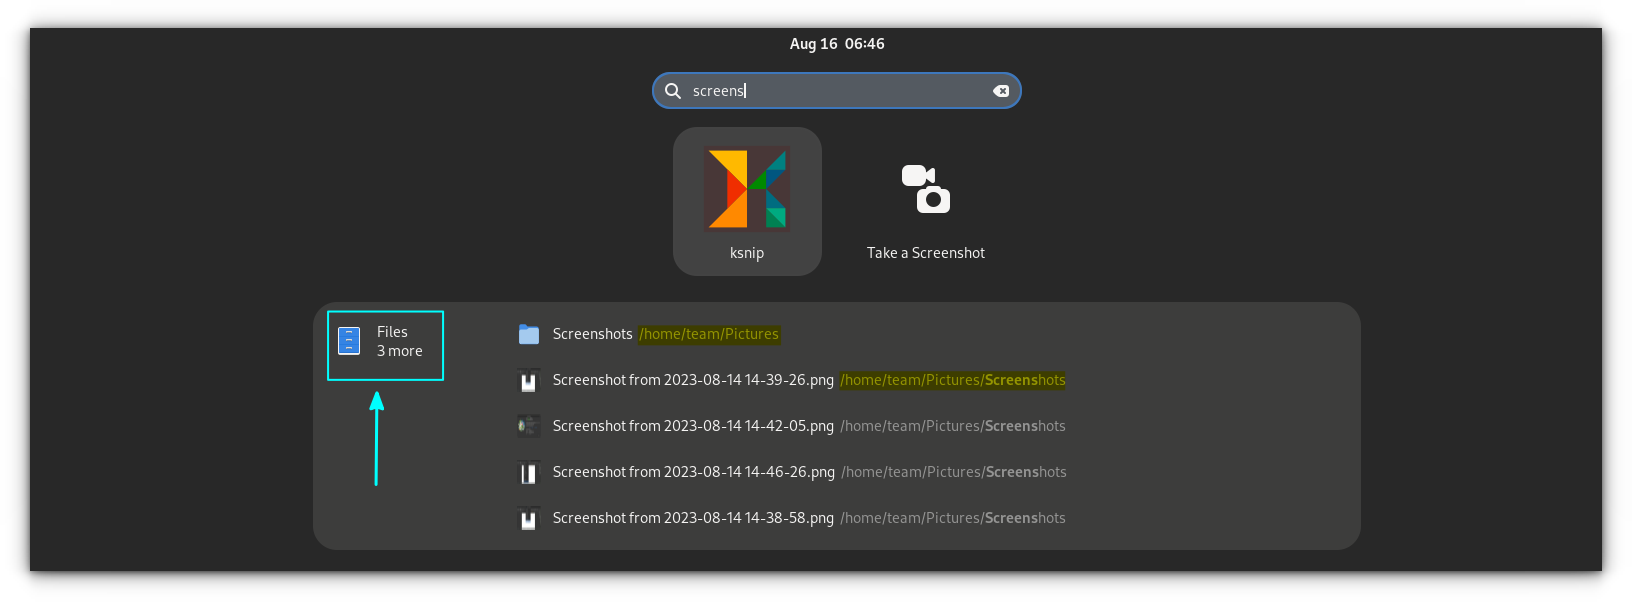
This will open the Nautilus file manager in search mode, where you can see all the files matched by the query.
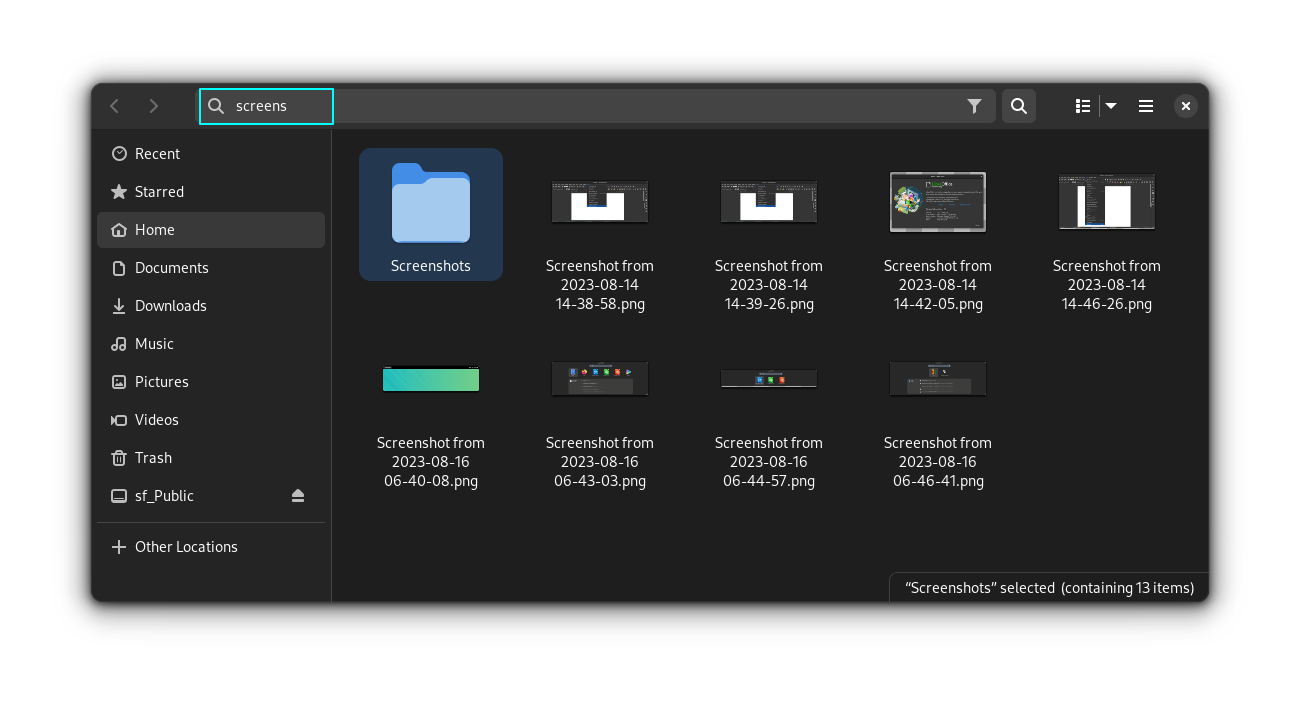
Similarly, if you press the icon of the app associated with the bulk search result, then that application, along with the suggested results, is opened.
💡
If you have GNOME Sushi installed, you can now preview these files in full mode before starting to work with them.
2. Copy emojis and special characters
GNOME has an application called gnome-characters. This provides you with several emojis and related characters. If you don’t have this application, you can install it using:
sudo apt install gnome-characters
Once installed, this application has its own search provider. This means that you can search for any character name. You can see various suggestions as you type.

Once you find some character, press Enter so that the selected character will be copied to your clipboard. You can paste it using CTRL+V.

Suggested Read 📖

3. Calculate without opening calculator app
Use the GNOME Shell search as a quick calculator. If you have to do some simple math calculations, there is no need to open the calculator app for this.
Instead, do it in GNOME activity itself.
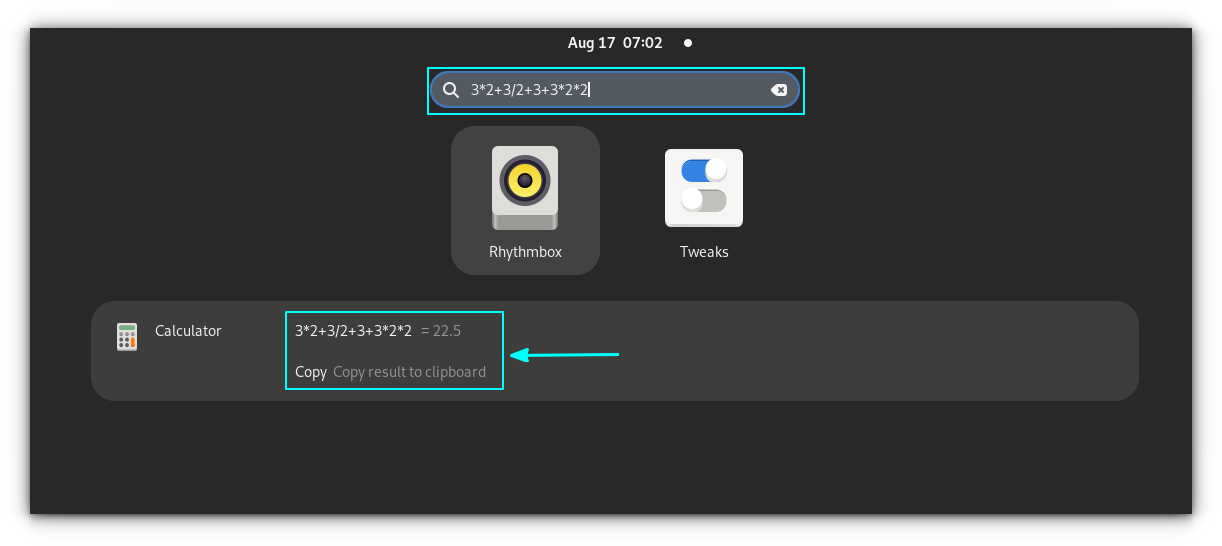
You can copy the result to clipboard also.
4. Get world clock
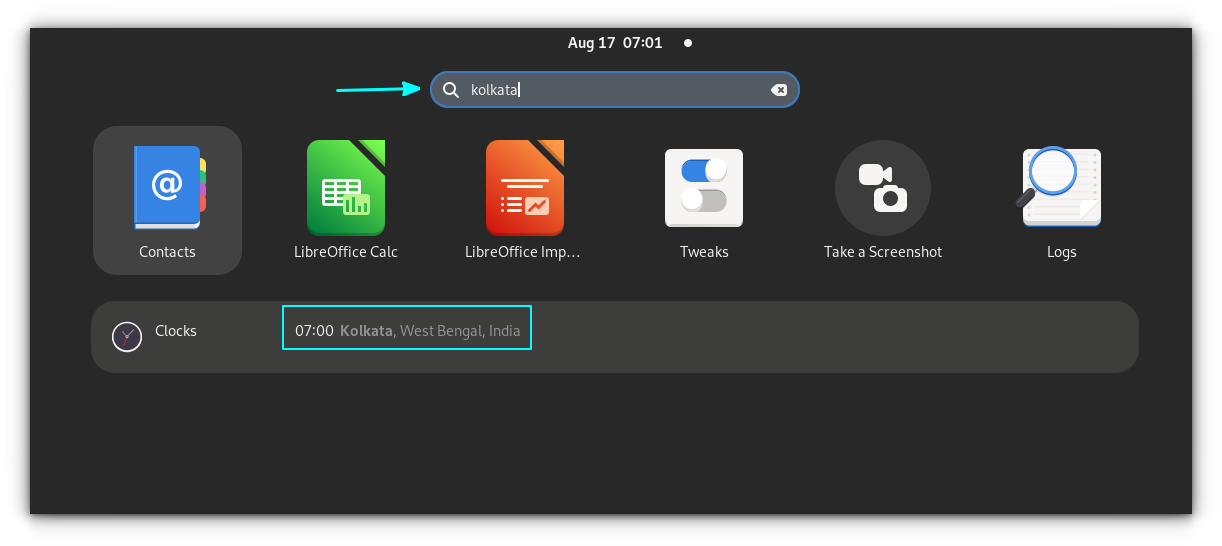
Want to know what time it is in another city? Why use some widgets and programs when GNOME shell can give you the time in a city by entering its name?
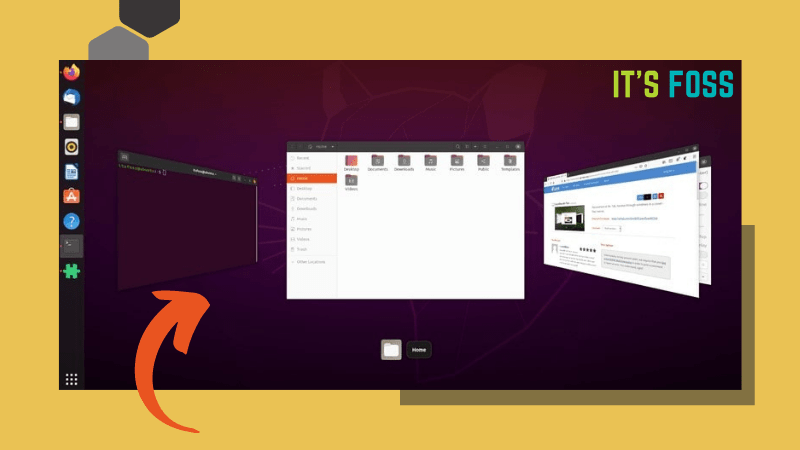
5. Move between running terminal windows
Let’s say you are running multiple terminal windows or multiple tabs in one terminal window with different active commands, like top, reading a file using bat or less etc.,
You can move to a particular terminal window, that is running a specific command by entering the command name in shell search.
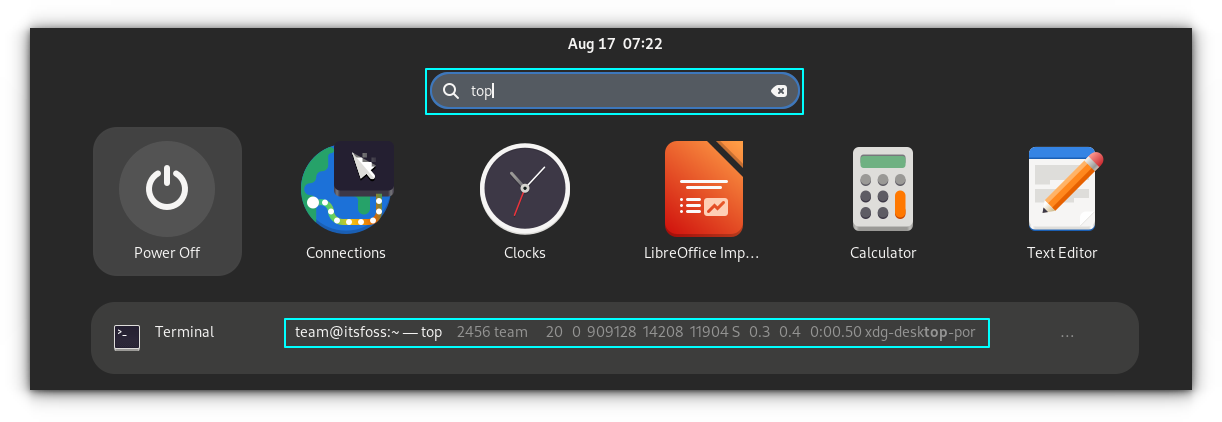
You can see that I am running top in one of my terminals and I can go directly into that. If it’s different tabs, it will switch you to the particular tab running that particular command.
6. Perform a web search
You can access the Firefox web search directly through the GNOME Shell. In order to make this work, you should need to open Firefox in the background.
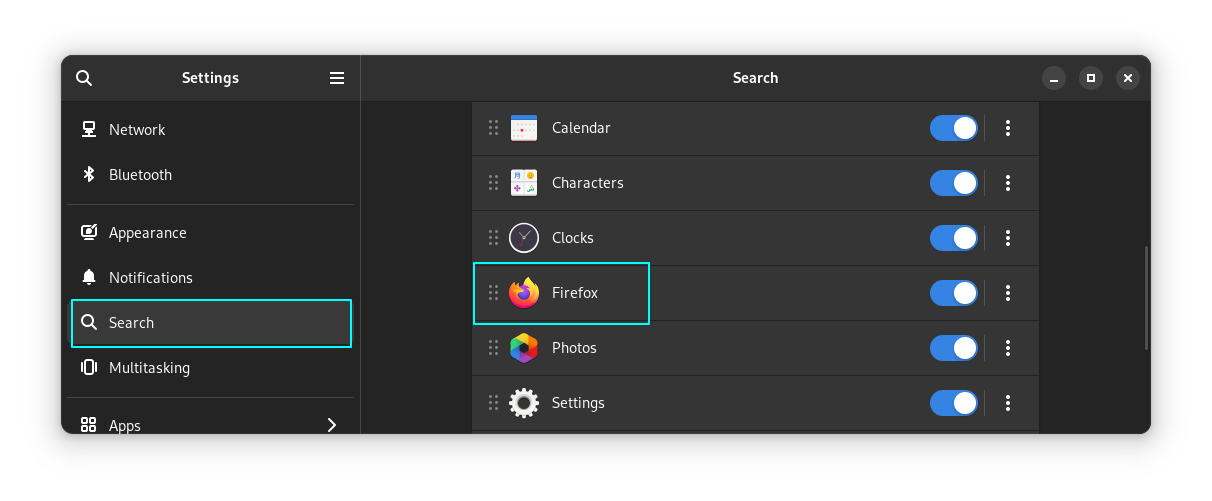
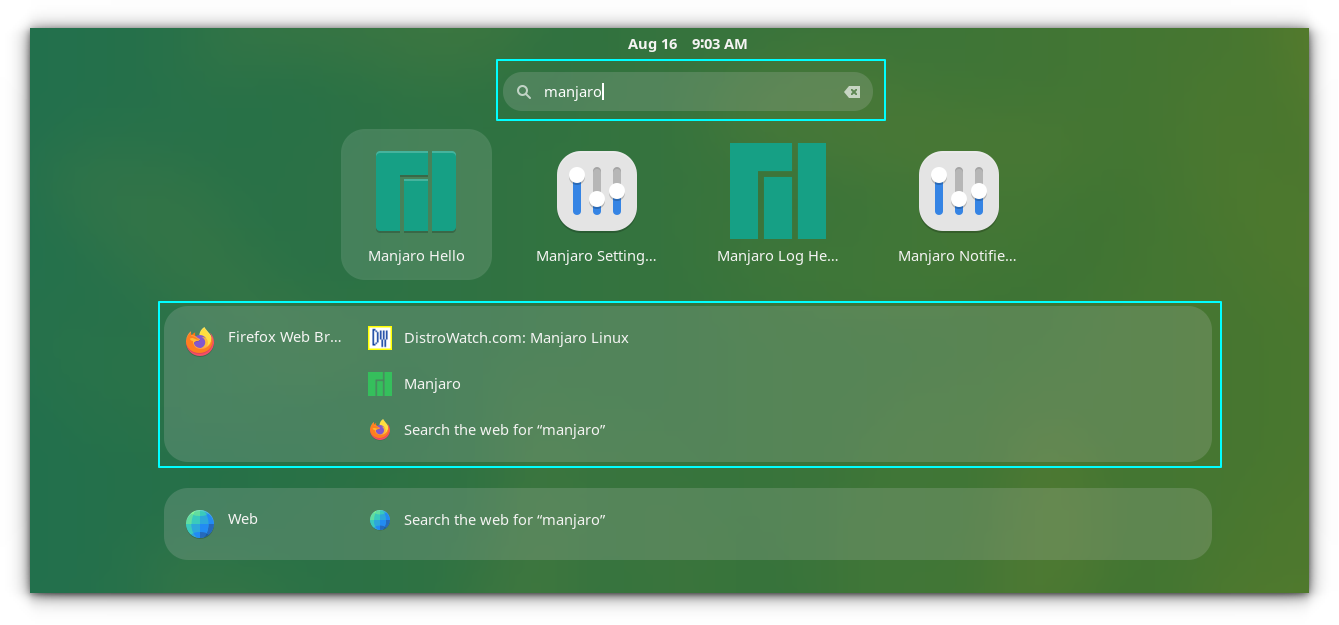
Once Firefox runs, you can search for web results on the activities overview. Also, you can reorder the Firefox appearance as you like in the system settings.
🚧
Unfortunately, on my Fedora 38 system, I couldn’t get any search results from Firefox, even though it’s a provider. And the one on Manjaro worked just as intended.
If you are using other distros, you can access web search results on shell search using Epiphany or GNOME Web browser. First, install Epiphany, either using your Package manager:
sudo apt install epiphanyOr, from Flathub:
flatpak install flathub org.gnome.EpiphanyOnce installed, open the settings and go to the search features. You can see that, an entry for GNOME Web has been appeared there.
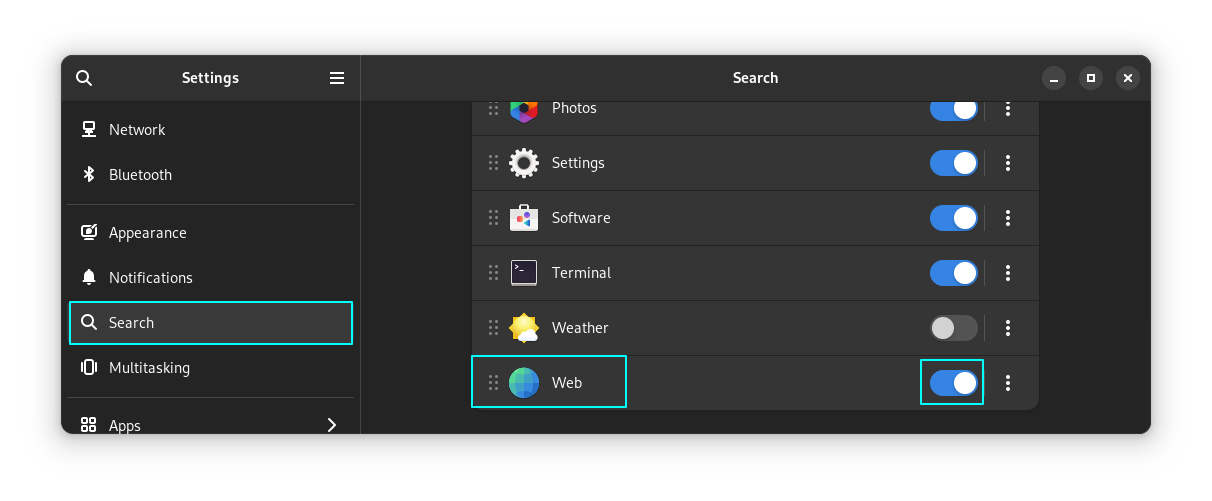
Simply toggle on, if it’s off. It will work even if GNOME Web is closed.

💡
If a new app is installed that provides some kind of search function, it will be listed on the searches tab.
7. Managing Search Appearance
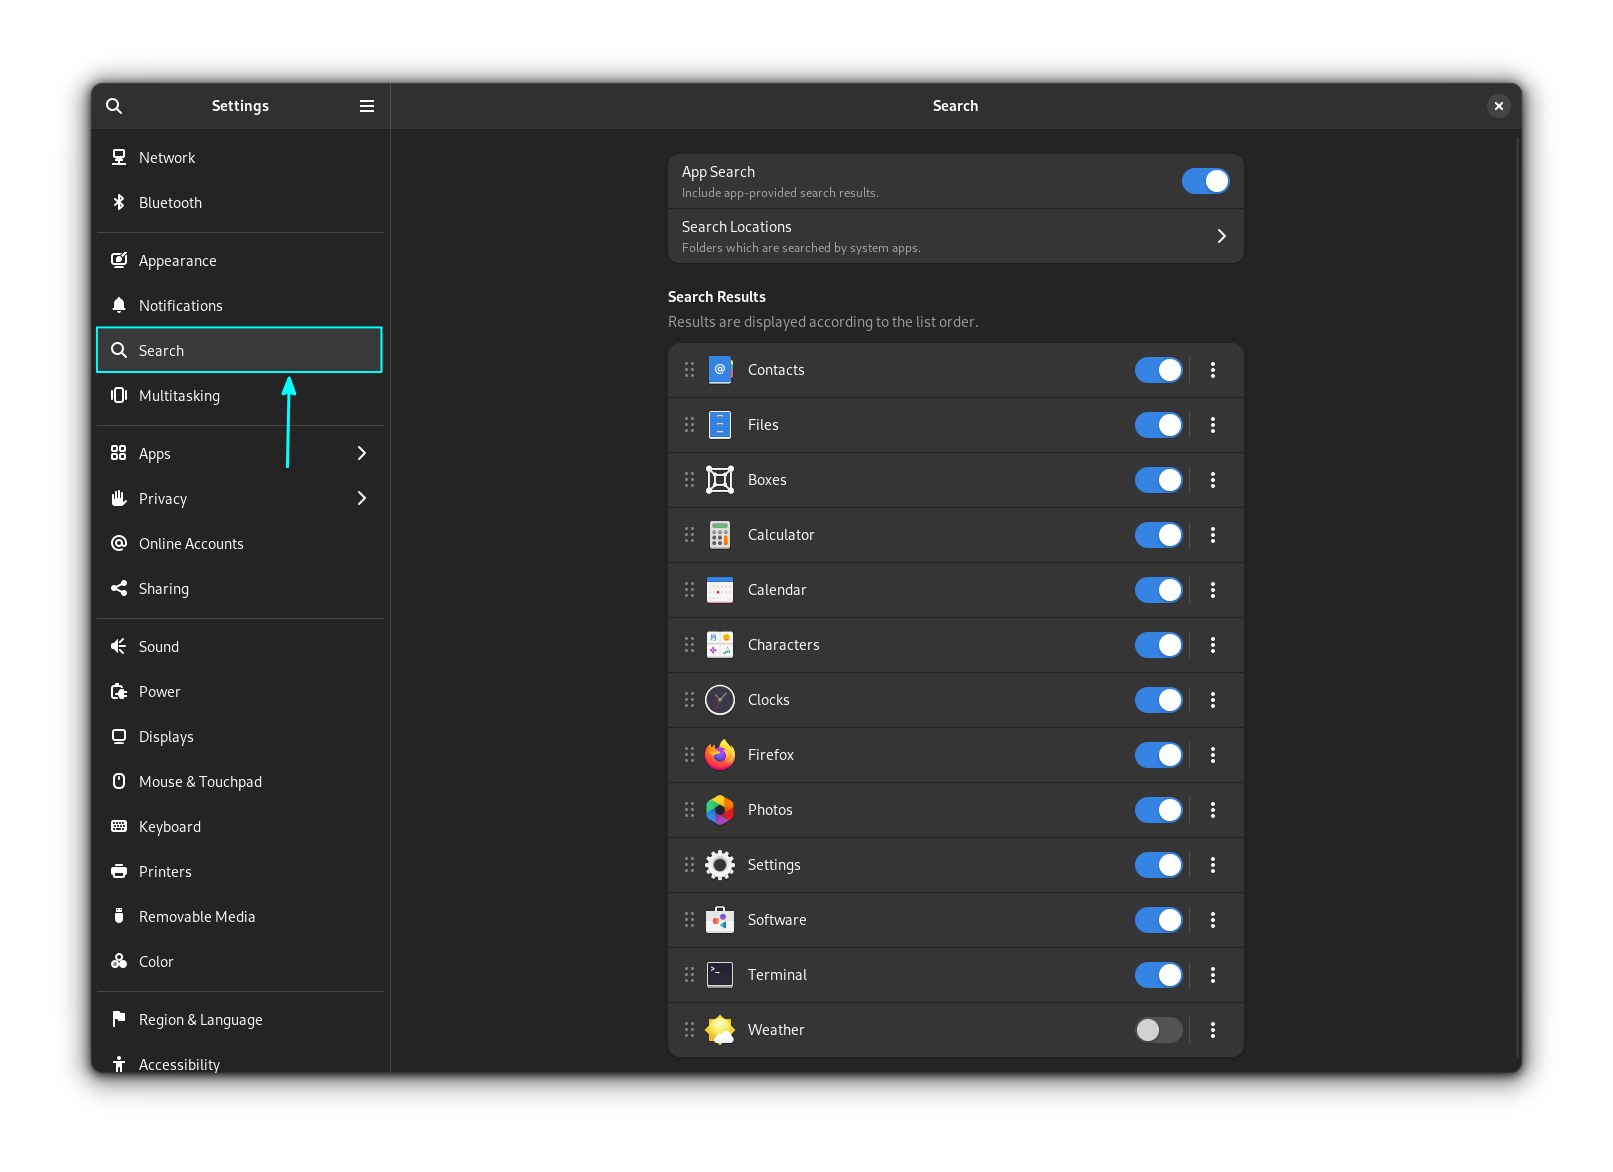
It is possible to reorder the appearance, disable some results, etc. using system settings.
Access search settings in System Settings app
Open System settings and go to the search tab.
Reorder Search Results Appearance
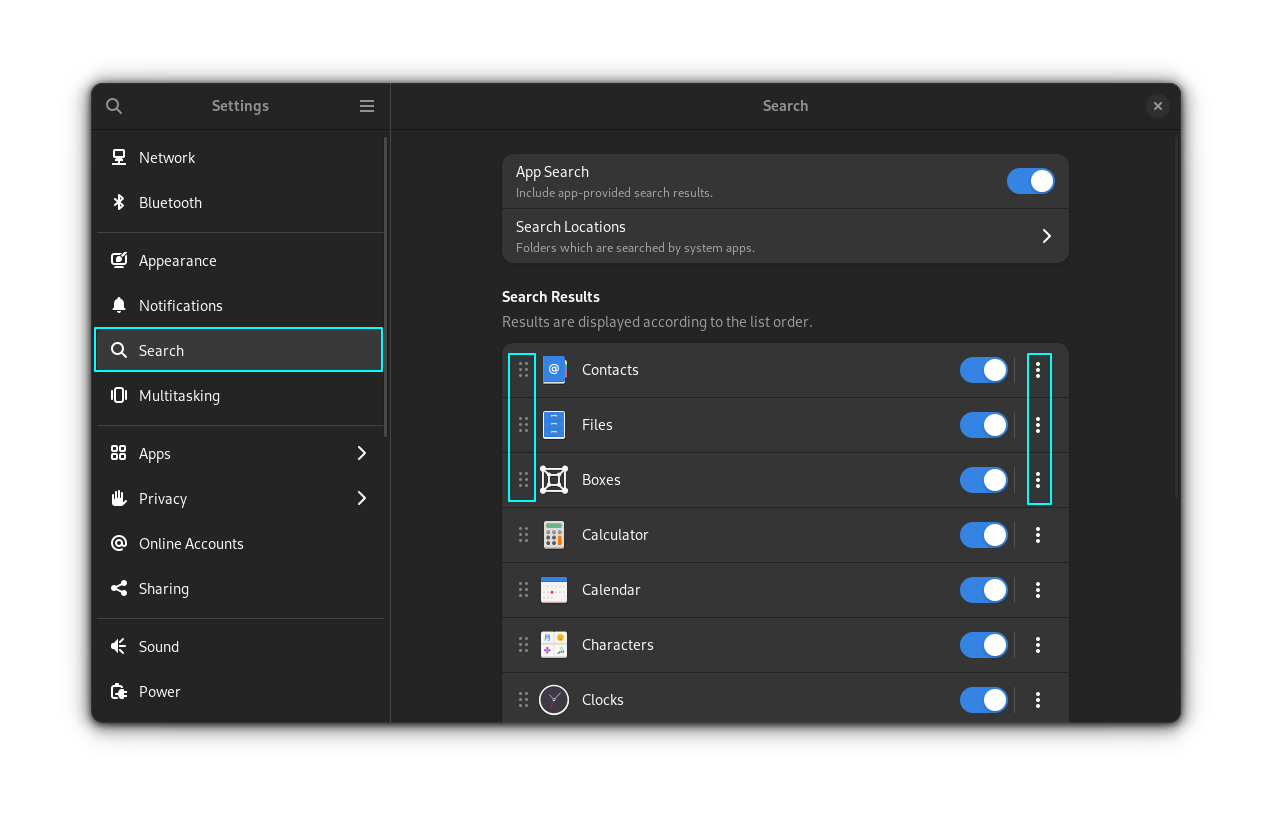
Upon opening the searches, you can see all the available providers listed. On each of the item, you can see a handle to the left side and three dots menus on the right side.
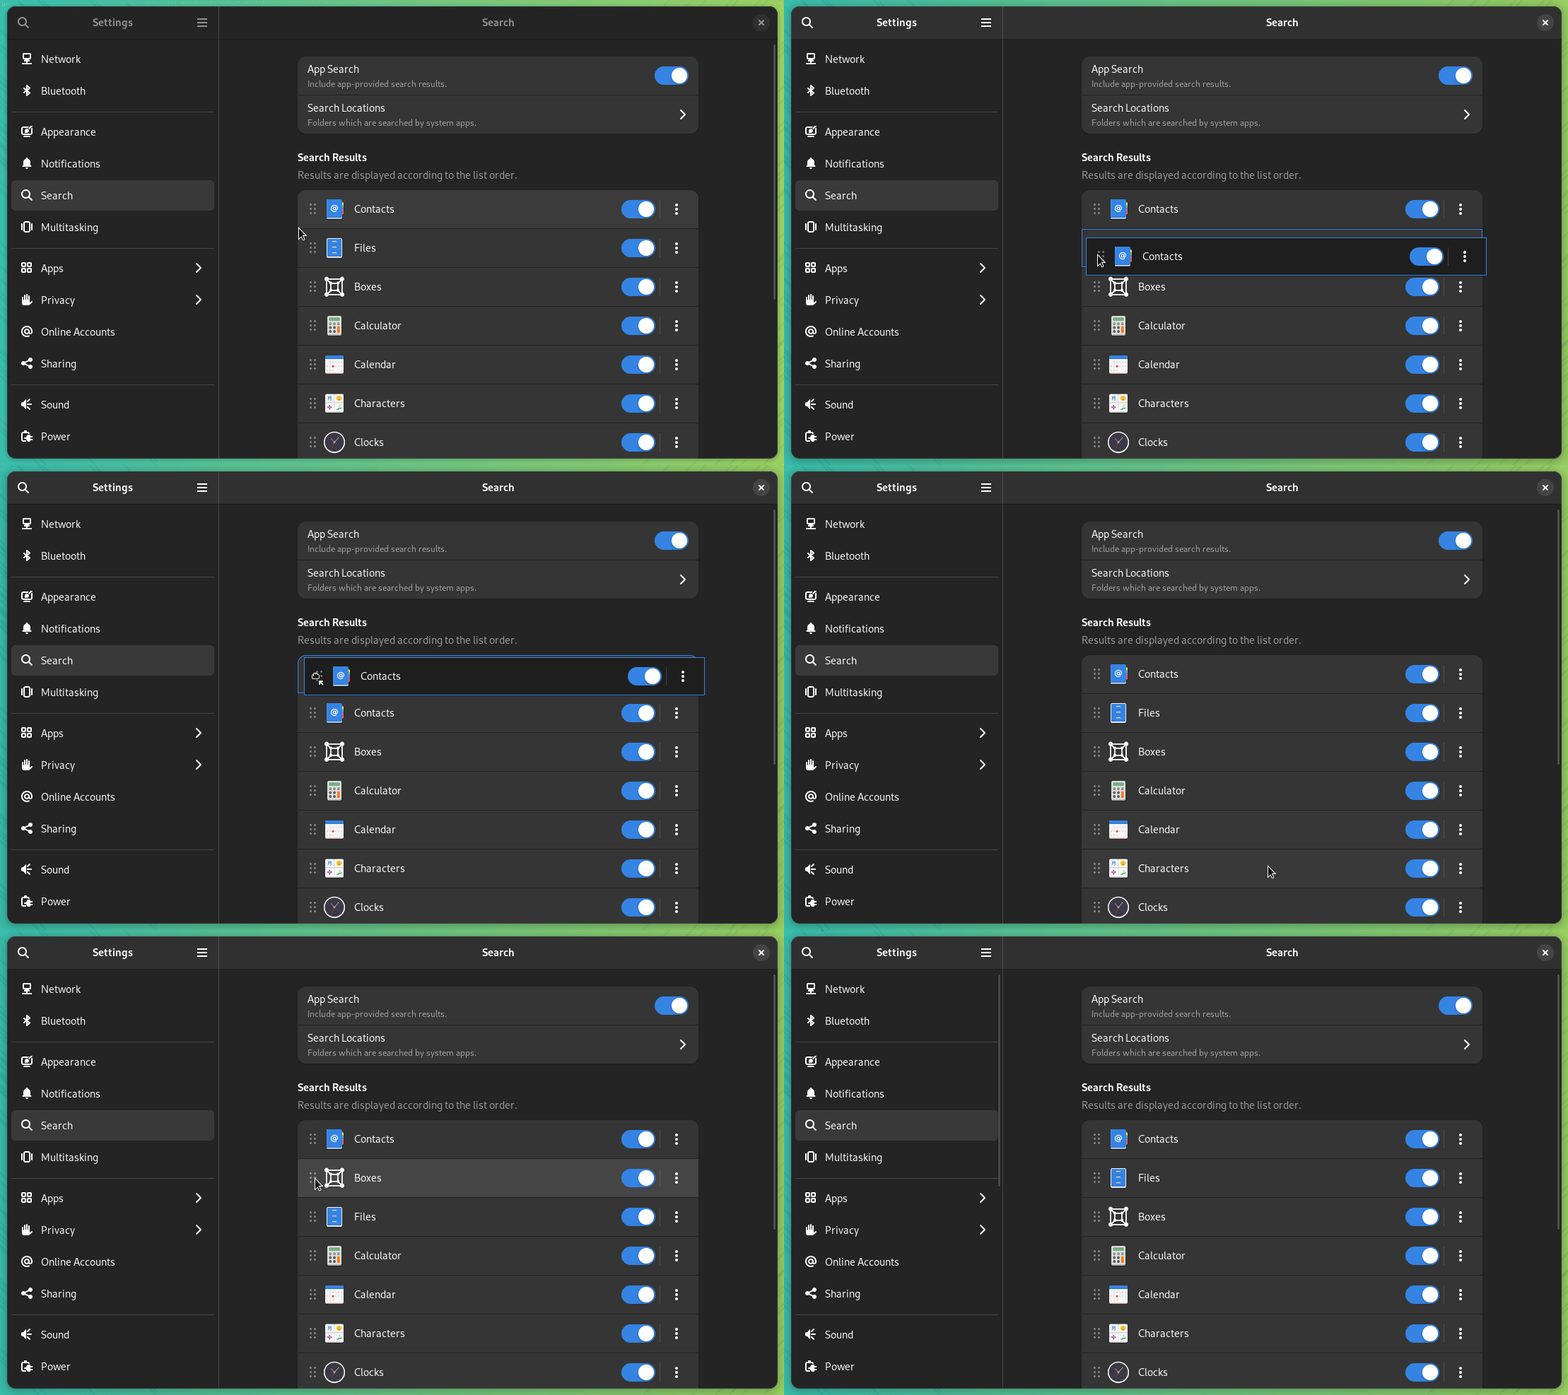
Either drag one item with the left side handle and place it to the required space.
Or, click on the three dot menu and select “Move Up” or “Move Down”.
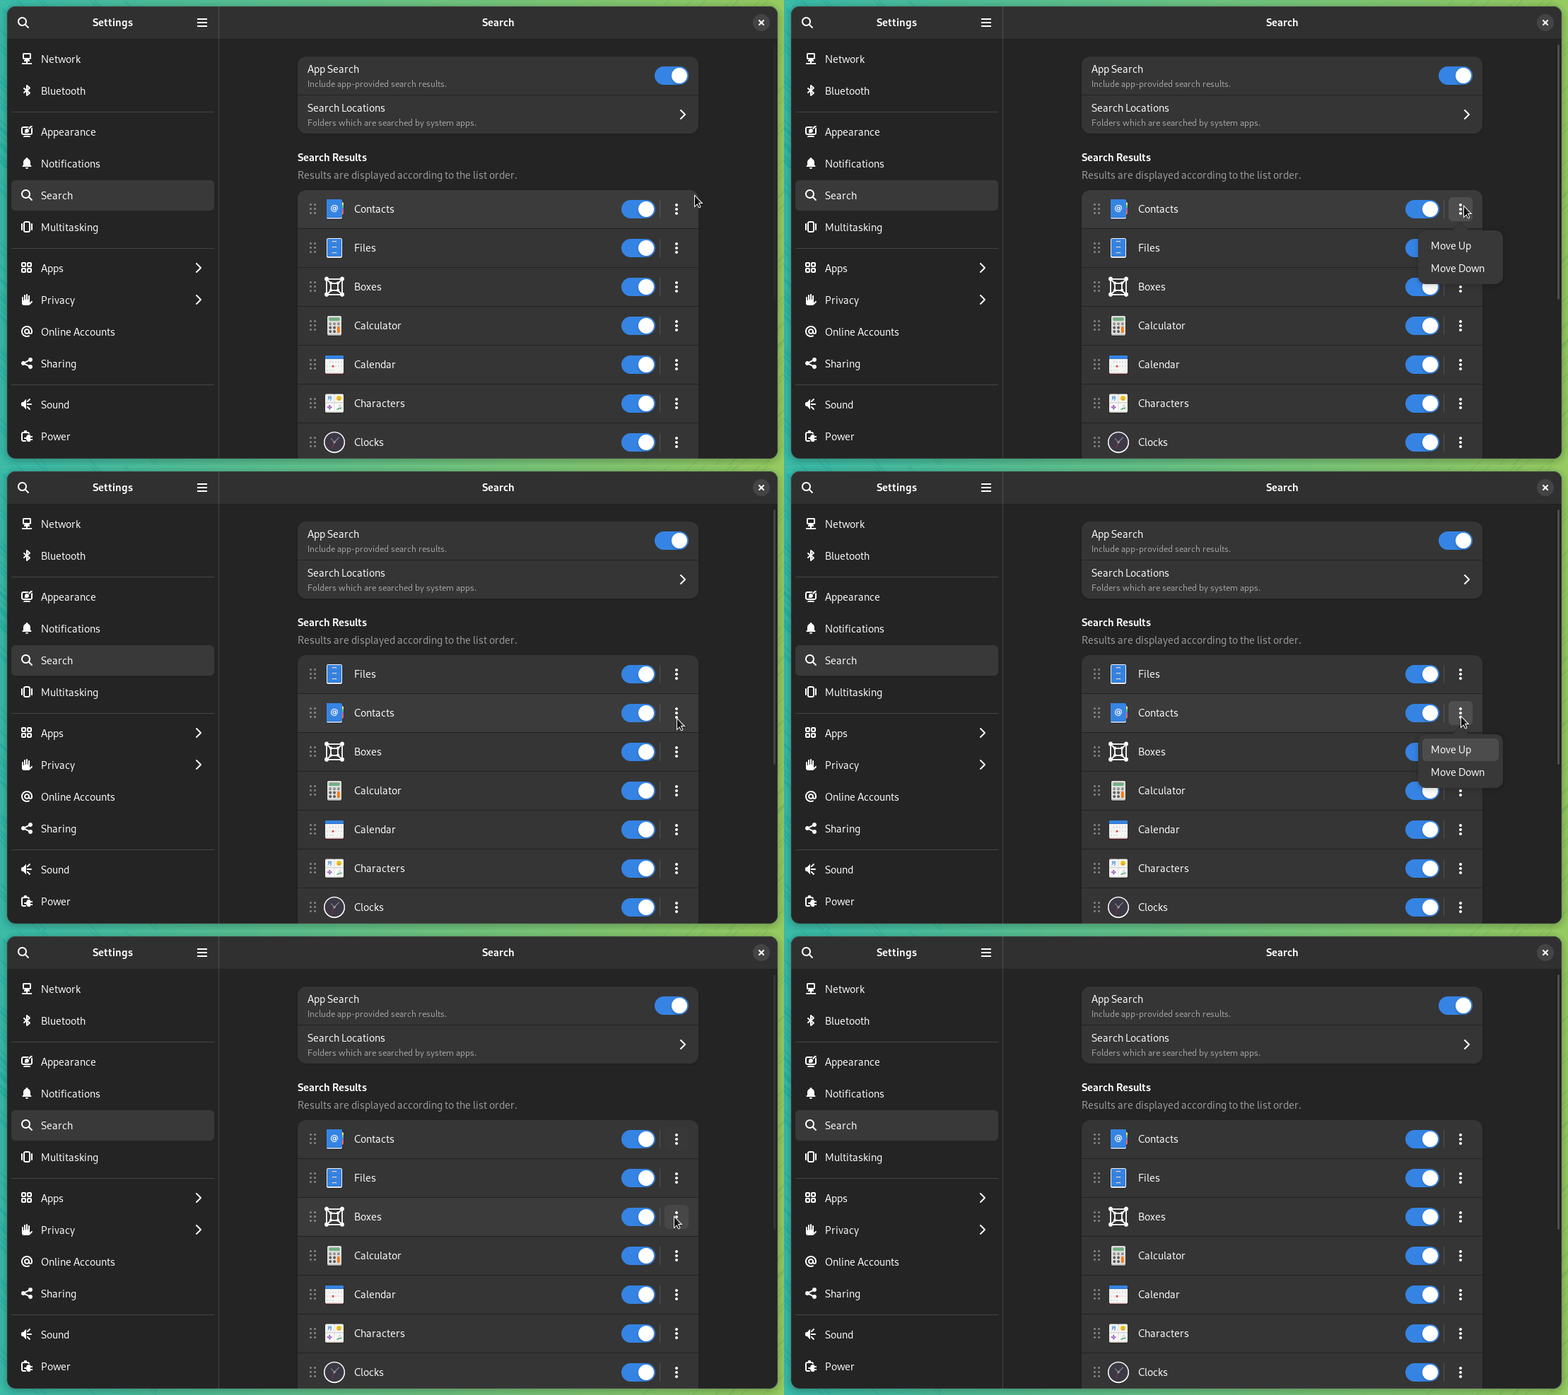
This arranged settings will be the new order in which the searches will appear on GNOME shell search results.
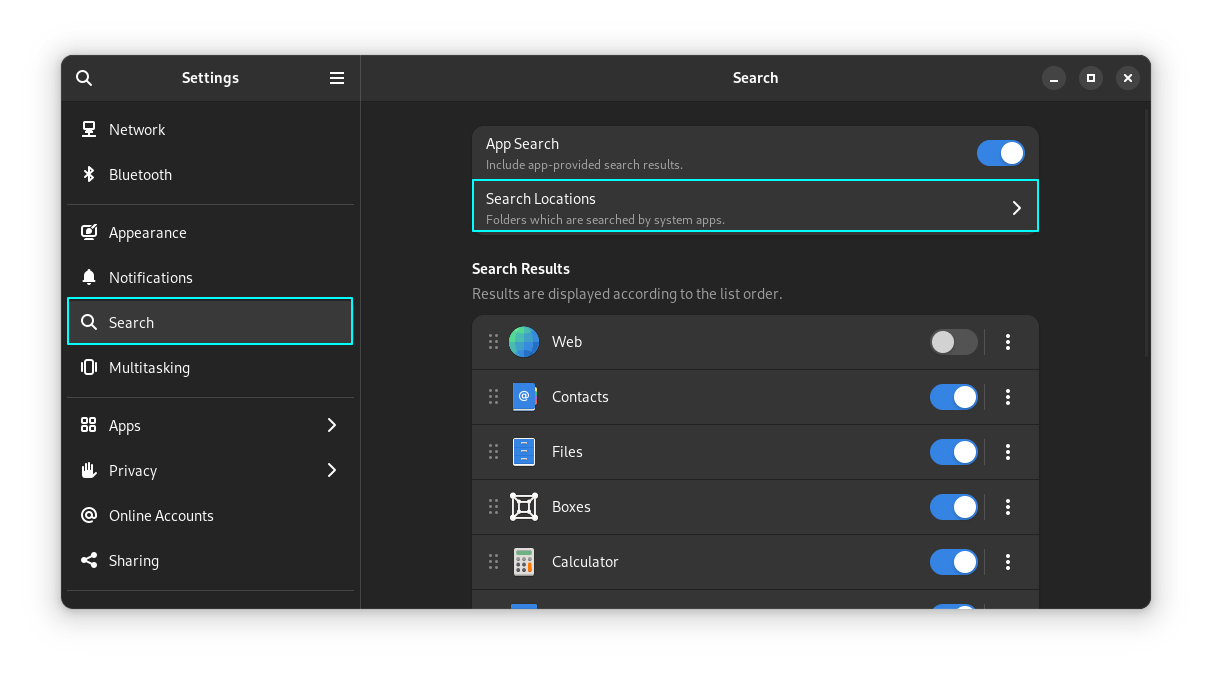
Manage Individual File Locations
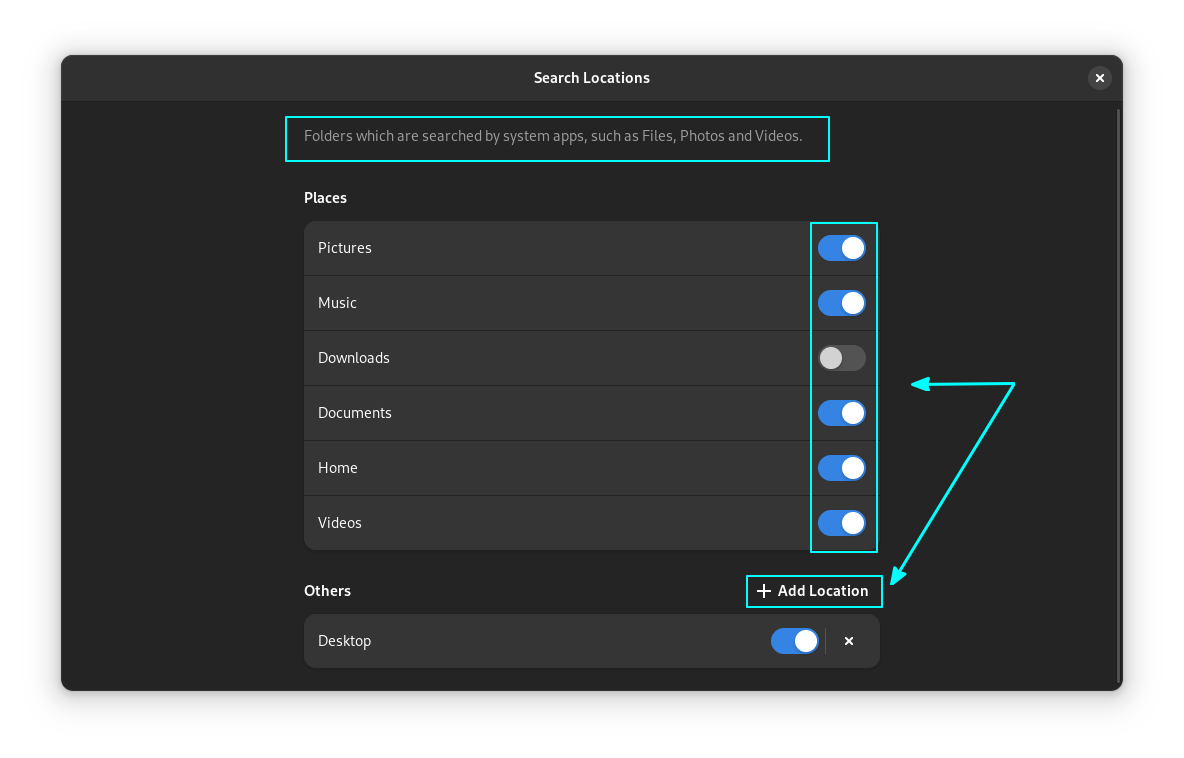
Tweak the locations searched by system apps like Files, Photos, Videos etc. by going to Search Locations on the searches tab.
Now, toggle on or off for disabling existing locations. Or Add new locations by clicking on the Add button.
Enable or disable a search provider from the search
If you are not using some of the search providers, you can free up some space on the search interface by disabling some unused search providers. For this, toggle off the particular provider using the toggle button on the right side of each item.
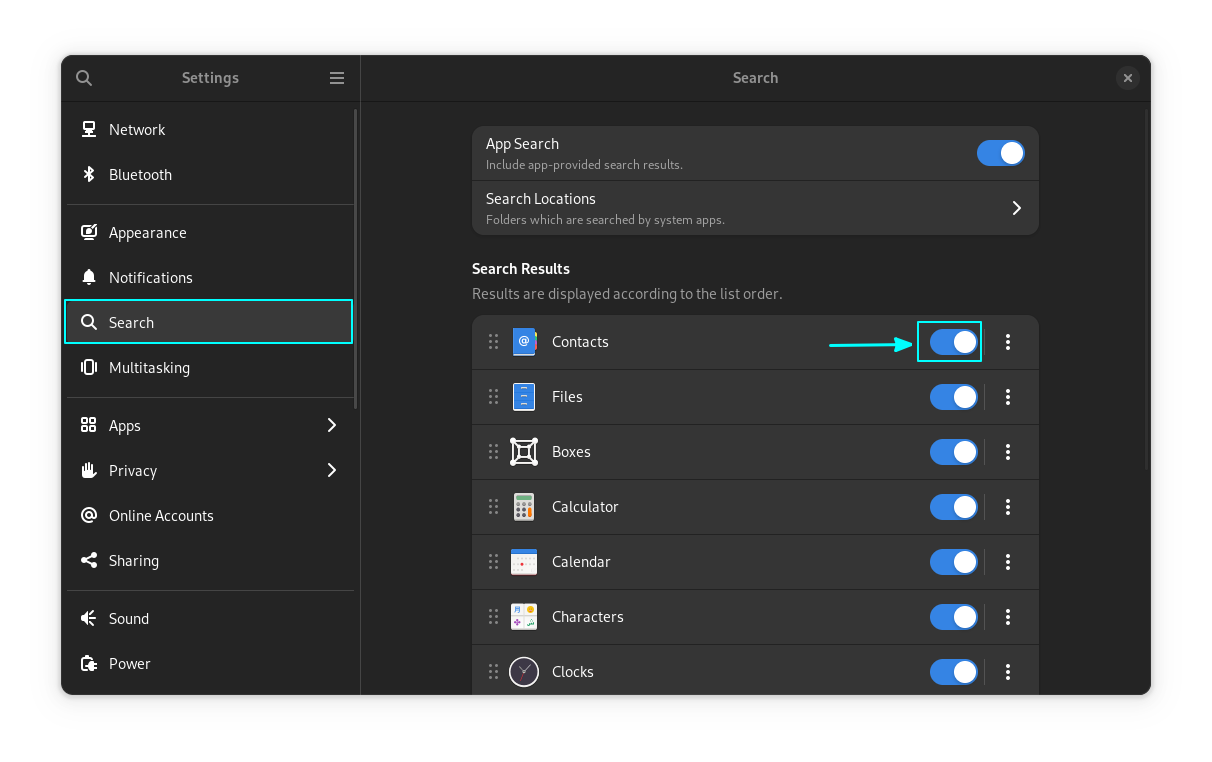
You can always turn it back on, by toggling the same button to on position.
Disable search altogether
Disable the in-app searches in GNOME Shell altogether by toggling off the App Search button.
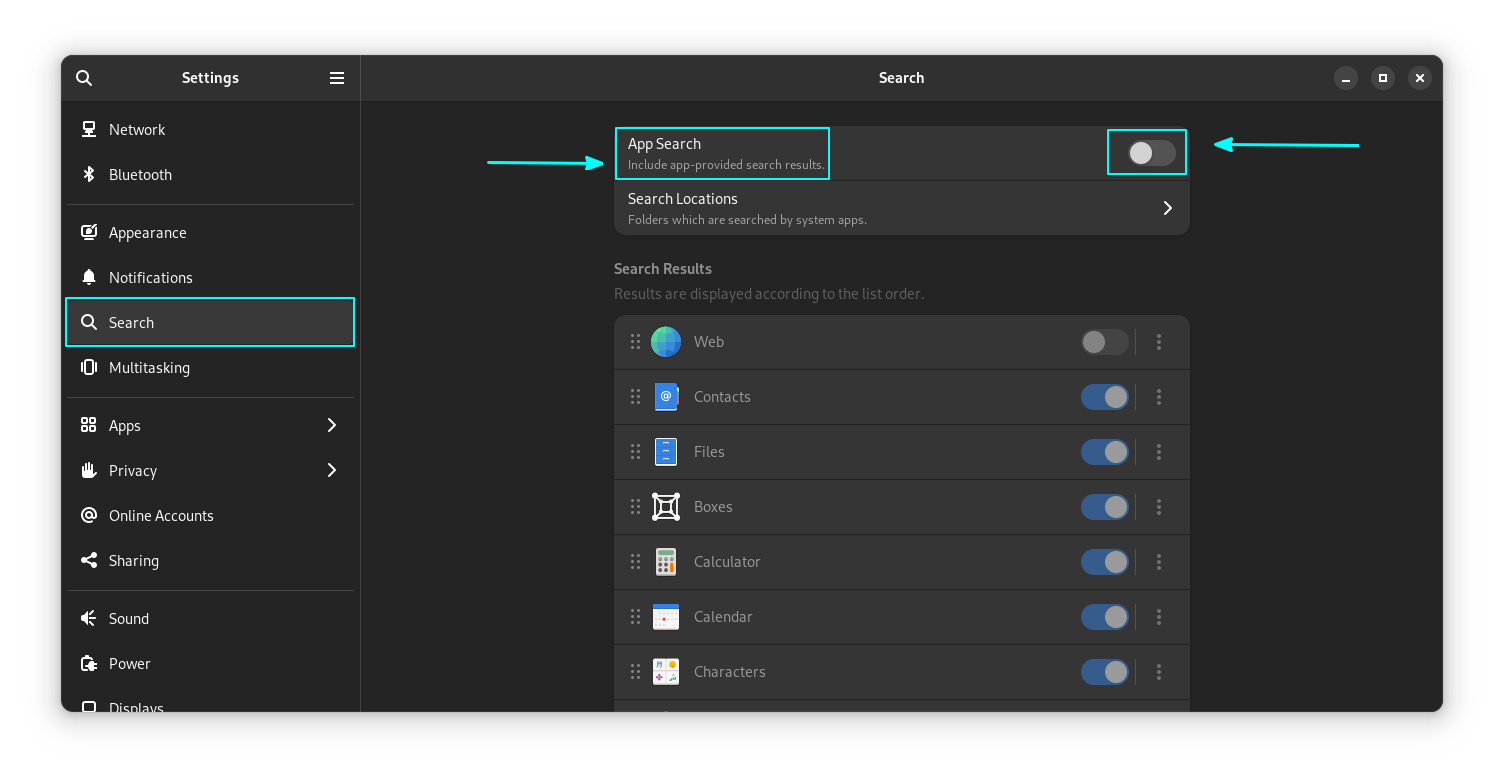
Only Applications can be searched, and the search results will be hidden from view.
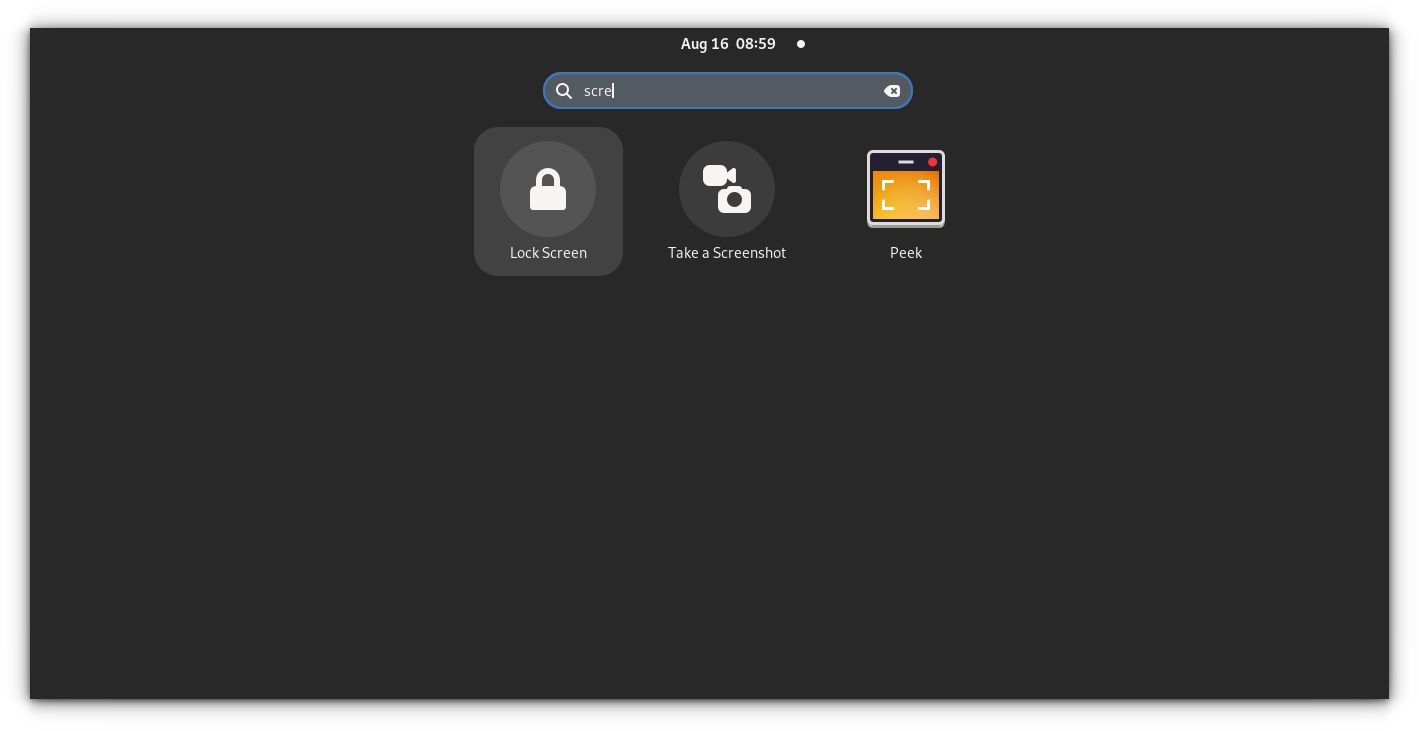
Bonus Tip: Extensions to make search more effective
There are several GNOME extensions that will make your search more accessible and productive.
Quick web search
This extension, called Quick Web Search, will add a search option for DuckDuckGo. Whenever we search some terms on the shell search, a DuckDuckGo icon will appear. Click on it, to open it on your preferred browser.
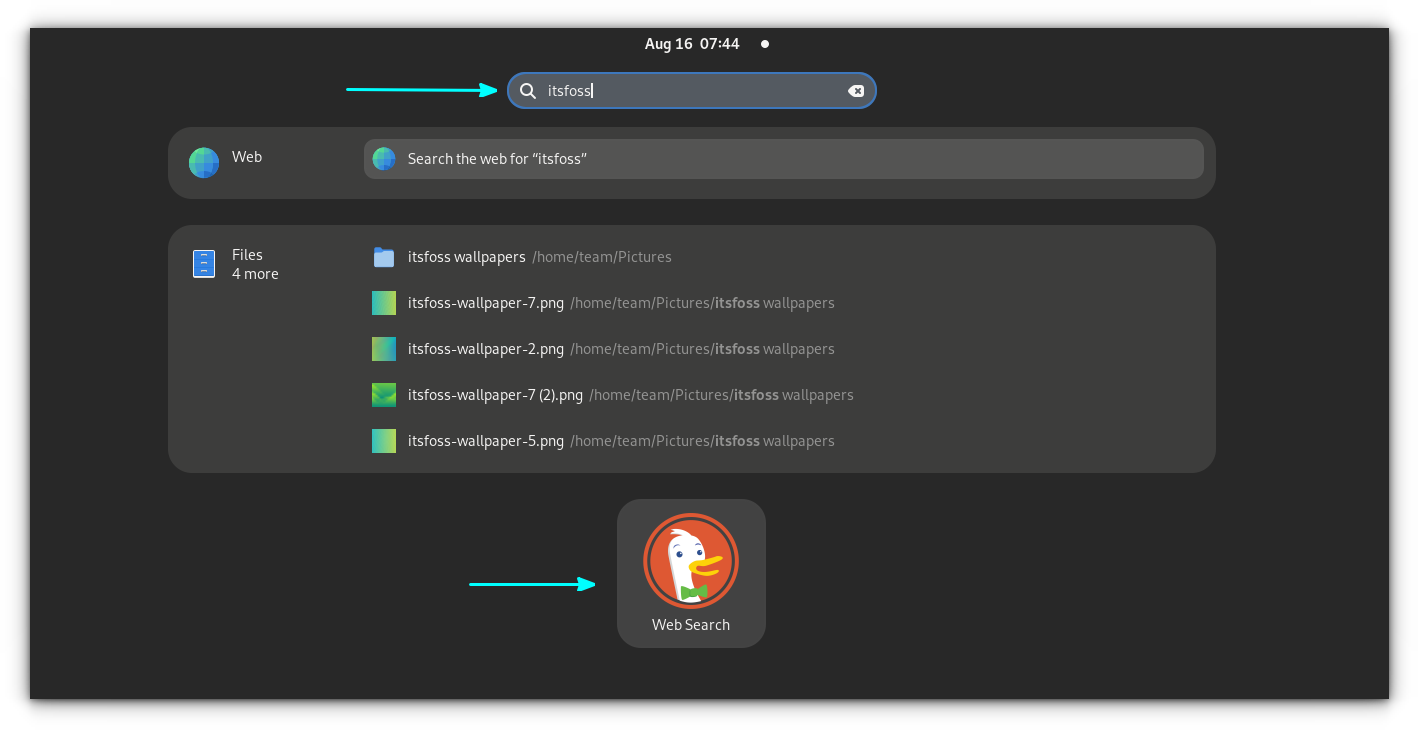
This works even if all the browser instances are closed. Also, you can change the search provider to Google and others by using the extension settings.
GNOME Fuzzy app search
It gives fuzzy application search results for Gnome Search. So even if you have misspelled or wrongly typed some names, it will try its best to match with a result.
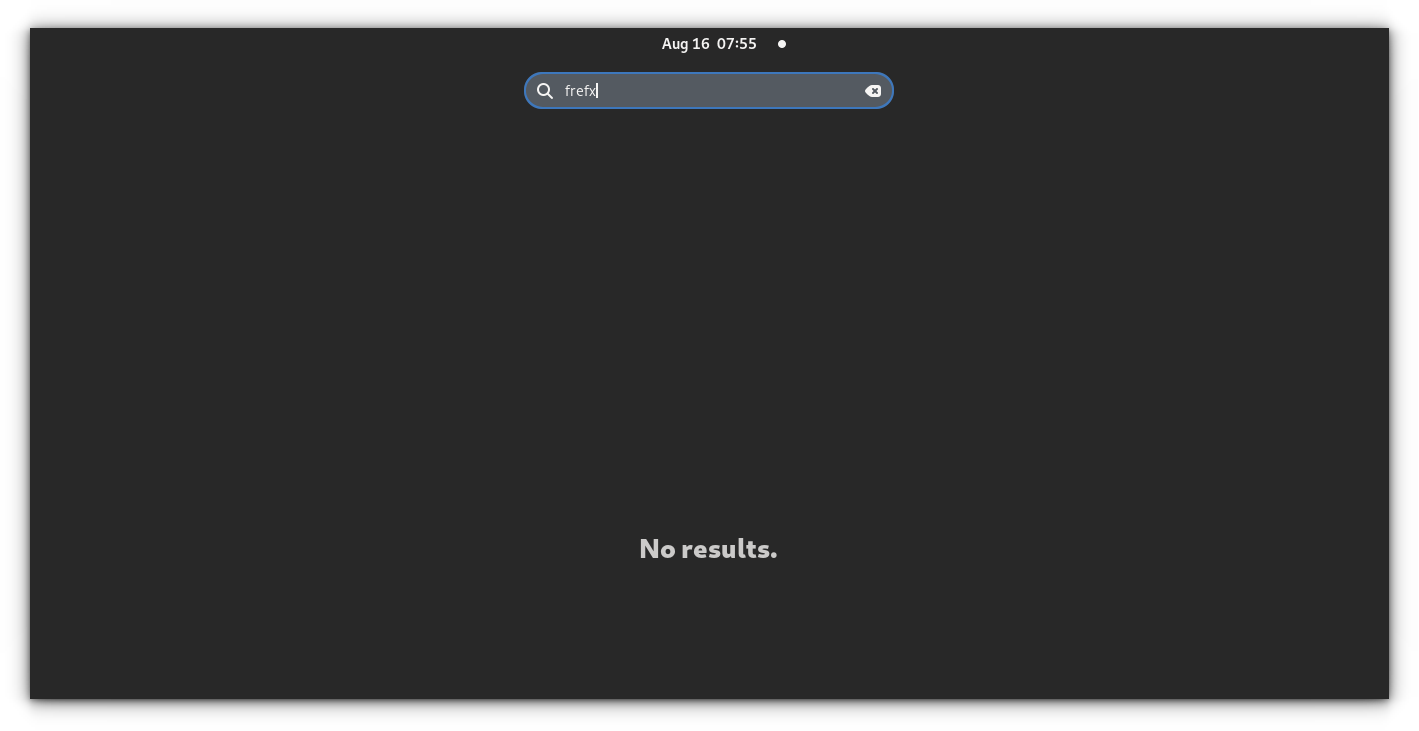
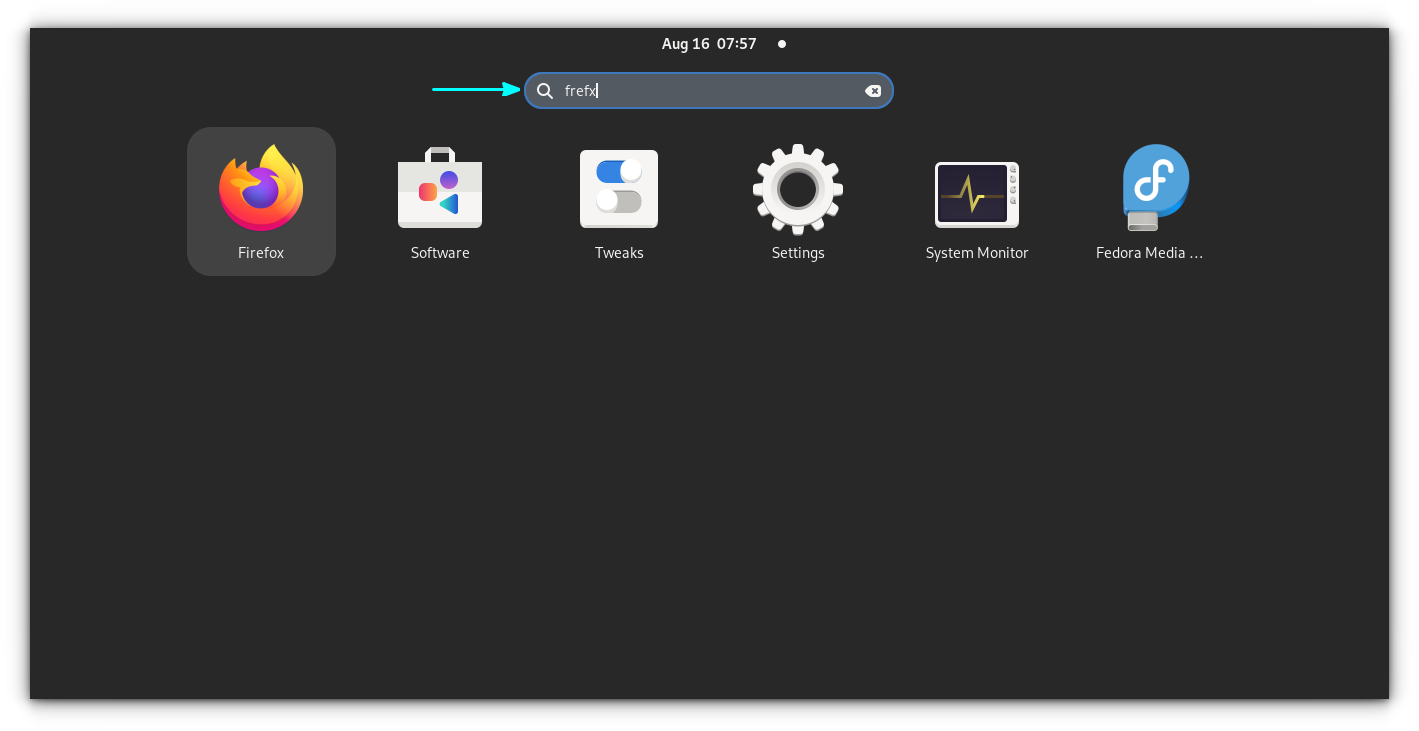
GNOME search using Fuzzy Search
Get more out of GNOME
As you can see, you probably never used all of these GNOME search features. Or perhaps never paid enough attention to them.
At It’s FOSS we take pride and feel joy in sharing such lesser-known features with our readers.
Here are a few more such articles that a GNOME user may find interesting.


🗨 I hope you liked this collection of tips. Please leave your suggestion in the comment section.


