
Glances: Monitor Remote Linux Systems from Anywhere
Glances is a free open source, modern, cross-platform, real-time top and htop-like system monitoring tool, which offers advanced features compared to its counterparts, and can run in different modes: as a standalone, in client/server mode, and in web server mode.
Considering the web server mode, you do not necessarily need to log into your remote server via SSH to run glances, you can run it in web server mode and access it via a web browser to remotely monitor your Linux server, as explained below.
To run glances in web server mode, you need to install it together with the Python bottle module, a fast, simple, and lightweight WSGI micro web-framework, using the appropriate command for your Linux distribution.
$ sudo apt install glances python-bottle [On Debian, Ubuntu and Mint]
$ sudo yum install glances python-bottle [On RHEL/CentOS/Fedora and Rocky/AlmaLinux]
$ sudo emerge -a sys-apps/glances python-bottle [On Gentoo Linux]
$ sudo apk add glances python-bottle [On Alpine Linux]
$ sudo pacman -S glances python-bottle [On Arch Linux]
$ sudo zypper install glances python-bottle [On OpenSUSE]
Alternatively, install it using the PIP command shown.
$ sudo pip install bottle
Once you have installed the above packages, launch glances with the -w flag to run it in web server mode. By default, it will listen on port 61208.
$ glances -w OR
$ glances -w &
If you are running firewalld services, then you should open port 61208 to allow inbound traffic to that port.
$ sudo firewall-cmd --permanent --add-port=61208/tcp
$ sudo firewall-cmd --reload
For the UFW firewall, run these commands.
$ sudo ufw allow 61208/tcp
$ sudo ufw reload
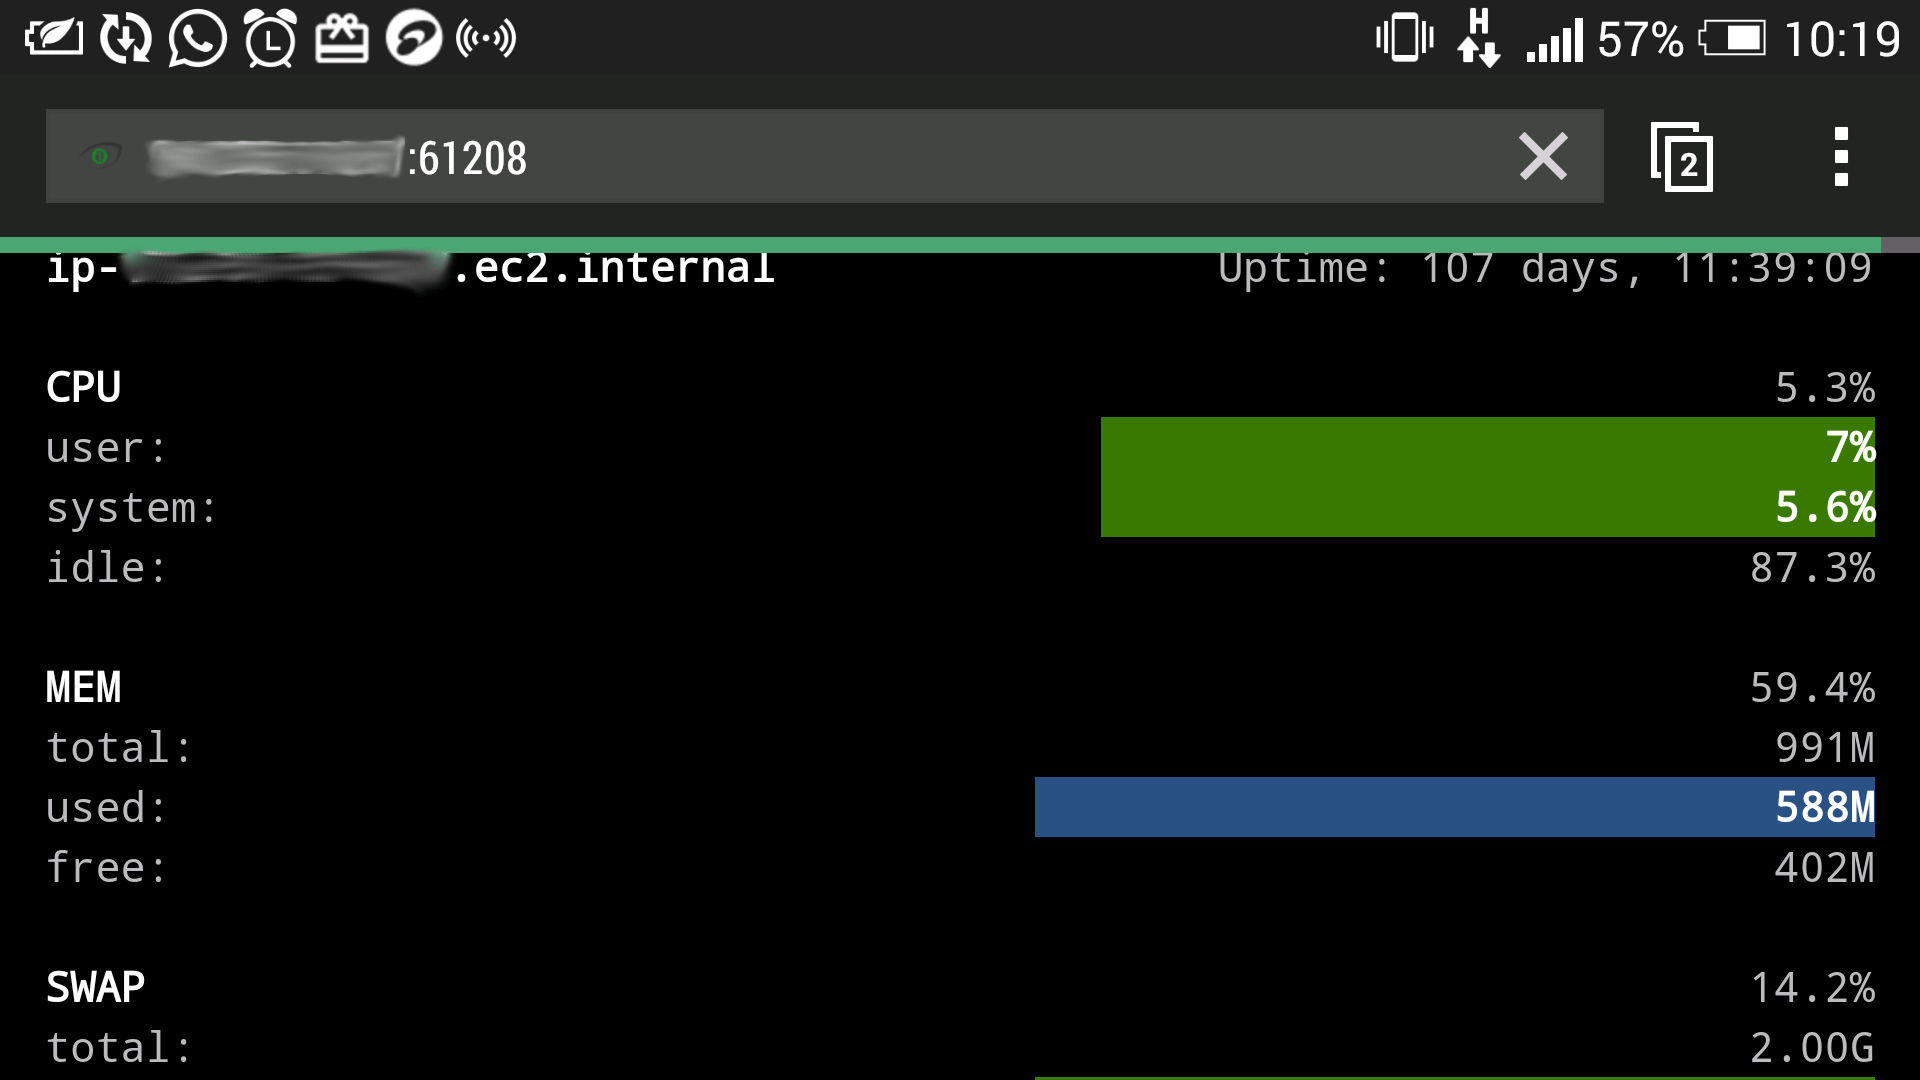
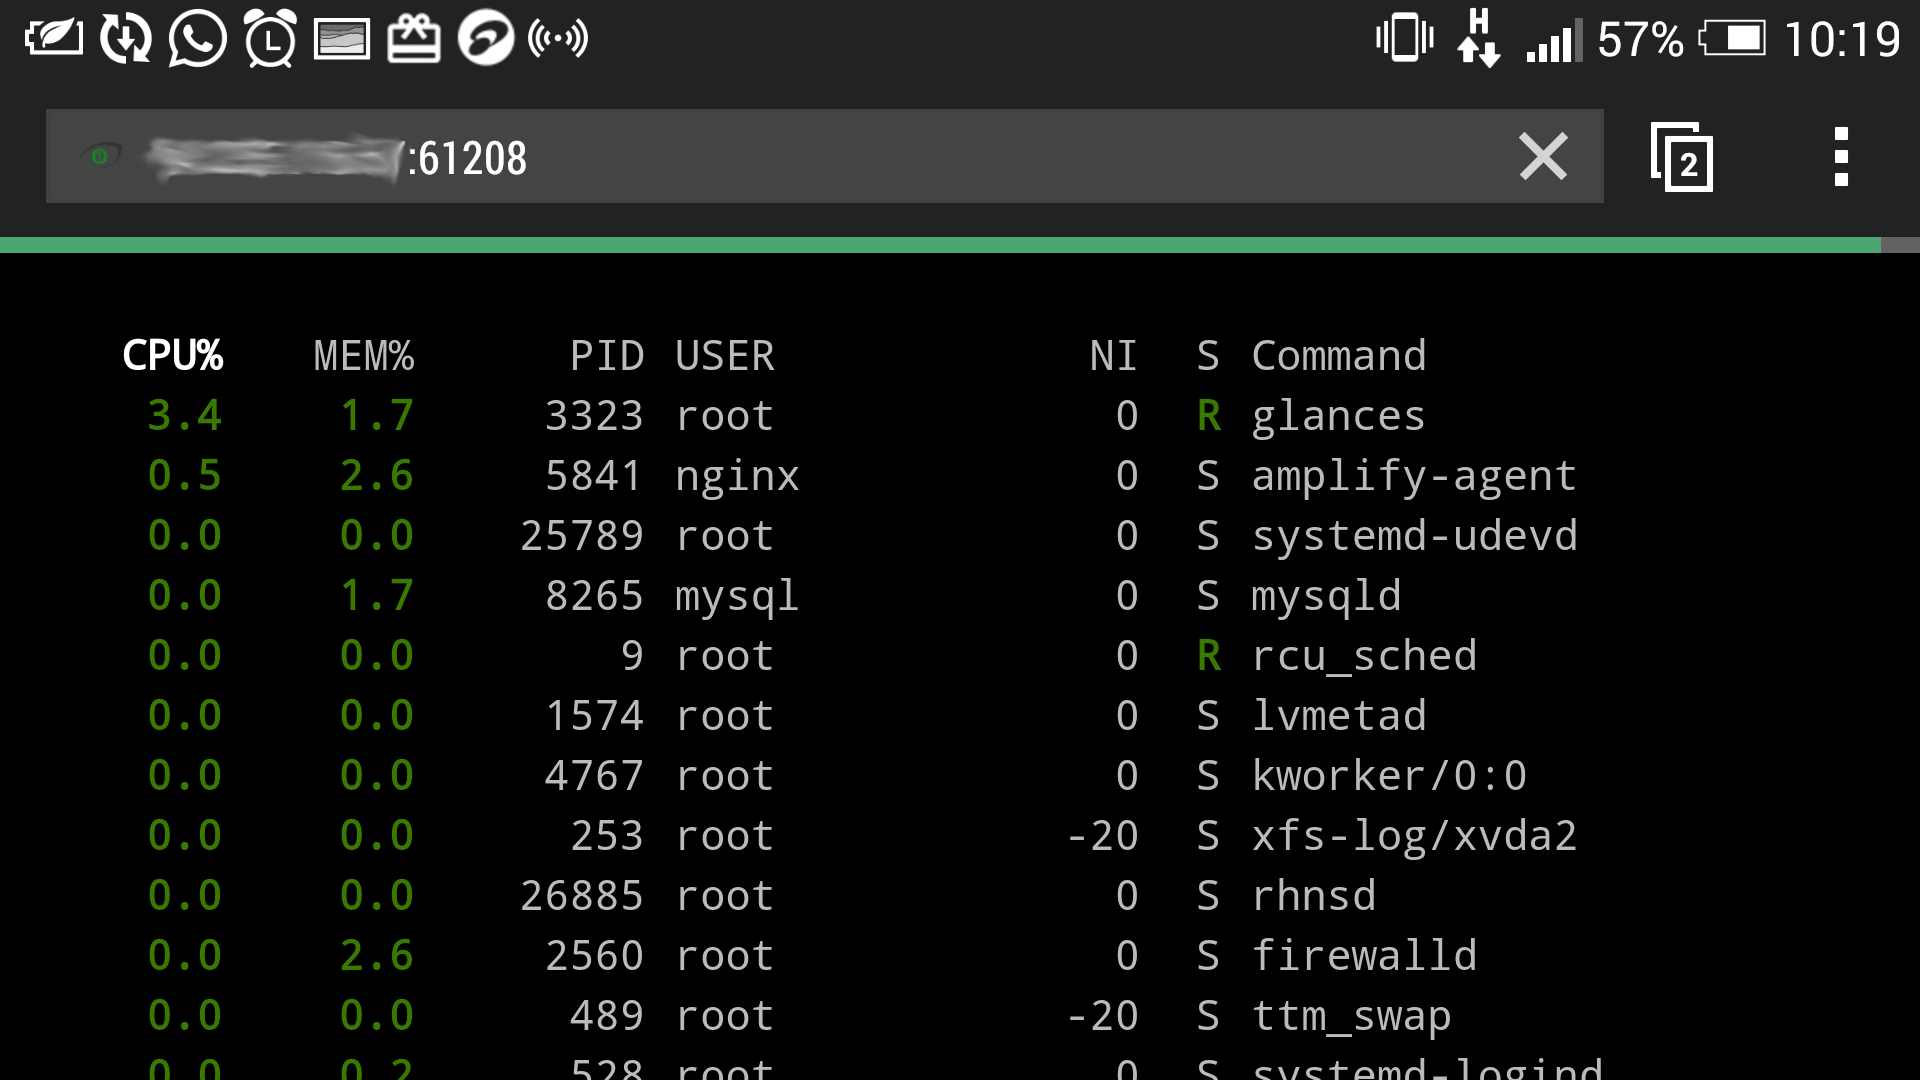
After that, from a web browser, use the URL http://SERVER_IP:61208/ to access the glances UI.
If you are using the systemd system and services manager, you can run glances in web server mode as a service for efficient management, as explained in the next section. I actually prefer this method to run it as a background process.
Run Glances in Web Server Mode as a Service
Start by creating your service unit file (which I have preferred to name as glancesweb.service) under /usr/lib/systemd/system/glancesweb.service.
$ sudo vim /usr/lib/systemd/system/glancesweb.service
Then copy and paste the unit file configuration below in it.
[Unit]
Description = Glances in Web Server Mode
After = network.target [Service]
ExecStart = /usr/bin/glances -w -t 5 [Install]
WantedBy = multi-user.target
The above configuration tells systemd that this is a unit-of-type service, it should be loaded after the network.target.
And once the system is in the network target, systemd will invoke the command “/usr/bin/glances -w -t 5” as a service. The -t specifies an interval for live updates in seconds.
The [install] section informs systemd that this service is wanted by “multi-user.target”. Therefore, when you enable it, a symbolic link is created from the /etc/systemd/system/multi-user.target.wants/glancesweb.service to /usr/lib/systemd/system/glancesweb.service. Disabling it will delete this symbolic link.
Next, enable your new systemd service, start and view its status as follows.
$ sudo systemctl enable glancesweb.service
$ sudo systemctl start glancesweb.service
$ sudo systemctl status glancesweb.service
Finally, from your web browser, use the URL http://SERVER_IP:61208/ to remotely monitor your Linux servers via the glances UI, on any device (smartphone, tablet, or computer).
You can change the refresh rate of the page, simply add the period in seconds at the end of the URL, this sets the refresh rate to 8 seconds.
http://SERVERI_P:61208/8
One downside of running glances in web server mode is that, if the Internet connection is poor the client tends to easily disconnect from the server.
You can learn how to create new systemd services from this guide: How to Create Systemd Unit File in Linux
That’s all! If you have any questions or additional information to add, use the comment form below.


