How To Add User To Sudoers On Ubuntu 20.04
This tutorial focuses on adding sudoers rights to a user on Ubuntu 20.04 Focal Fossa.
When managing an Ubuntu 20.04 server, it is actually quite important to know how to add sudoers to it.
The sudo command is a very popular command on Linux.
It allows unauthorized users to perform commands as another user, by default being the root user.
On Ubuntu 20.04, we will focus on three different ways to add a user as sudo : add it to the sudo group, to the sudoers file or using the graphical interface.
Here are the details of the three different methods.
Table of Contents
sudo command is available by default.
$ which sudoNote : the “which” command can be used in order to verify the existence of the sudo command on your host.

If you notice that this is not the case, you can install sudo by running the following commands.
$ apt-get update
$ apt-get install sudo
In order to add a user to sudoers, you have to use the “usermod” command and the capital G (for secondary groups).
$ sudo usermod -a -G sudo <user>
In order to verify that your user was correctly added to the sudo group, you have to use the “groups” command.
If you see “sudo” as a secondary group for your user, congratulations, you successfully added your user to sudoers!
Adding a user to sudoers using gpasswd
A less popular, yet very powerful way to add a user to sudoers is to use the gpasswd command.
$ sudo gpasswd -a <user> sudo
As a quick reminder, gpasswd is used in order to administer the “/etc/group” file on your filesystem.
Adding an existing user to the sudoers file
By default, on Ubuntu 20.04, the sudoers file is located at /etc/sudoers.
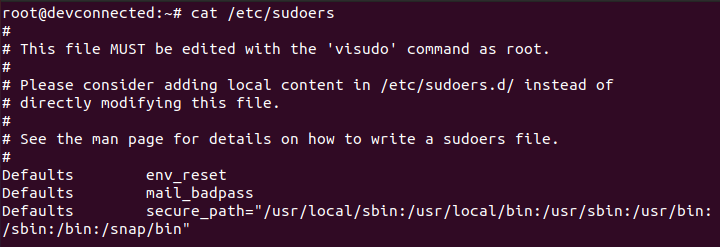
This file contains a set of rules that are applied in order to determine who has sudo rights on your system.
Also, the sudoers file can define privileges such as the commands that can be executed with or without sudo, or if you should be prompted with a password.
By default, you should not modify the sudoers file by yourself (the same logic applies to cron jobs for example).
If you were to corrupt this file, you might would not be able to get sudo rights again.
Instead, you are going to use “visudo” : a tool designed to make sure that you don’t make any mistakes.
$ sudo visudo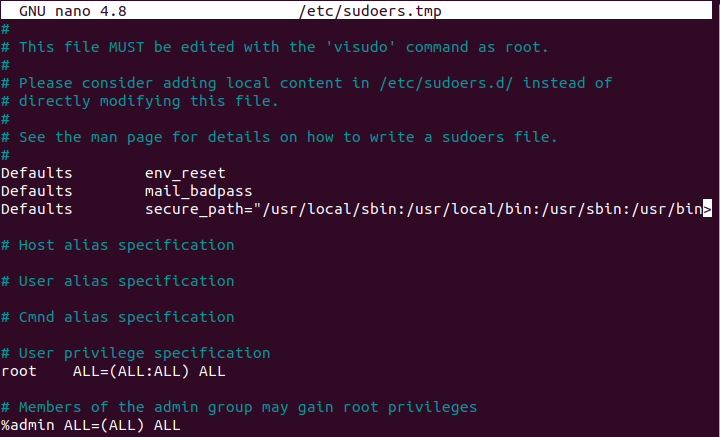
At the end of the file, add a new line for the user.
john ALL=(ALL:ALL) ALL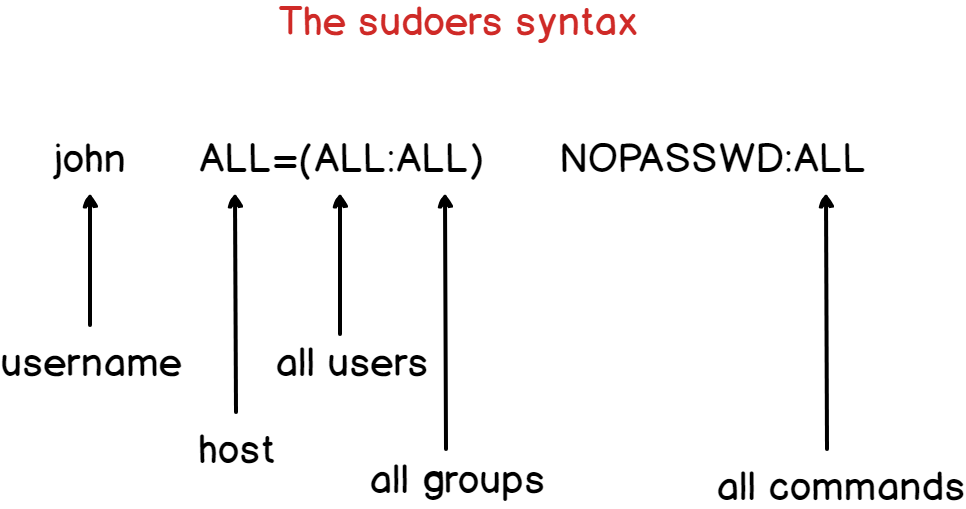
By saving and exiting the file, the user “john” will be automatically added to the sudo group.
By default, the account password will be asked every five minutes in order to perform sudo operations.
If you want to remove the password verification, you can simply add the “NOPASSWD” option.
john ALL=(ALL:ALL) NOPASSWD:ALLNote : if you add a user to the sudoers file, it does not mean that the user will belong to the sudo group on the system. It will be authorized to perform sudo operations, but it won’t be listed if you use the “groups” command.
Tweaking password verification
If you want to tweak the password verification period, or if you want to increase the verification, you have to modify the “timestamp_timeout” parameter.
# /etc/sudoers
#
# This file MUST be edited with the 'visudo' command as root.
#
# See the man page for details on how to write a sudoers file.
# Defaults env_reset
Defaults mail_badpass
Defaults secure_path = /sbin:/bin:/usr/sbin:/usr/bin
Defaults timestamp_timeout=30
In this case, the password will be asked every thirty minutes.
Adding a user to sudoers using the graphical interface
On recent Ubuntu distributions, it is possible to add a user to the sudo group very easily.
First, head over to the “Activities” tab located at the top left corner of your screen and type “Users“.
You should see a screen similar to this one.

Next, you will have to unlock the panel by clicking on “Unlock”.

You will be asked for your password, note that the account has to be a privileged account in order to perform this operation.
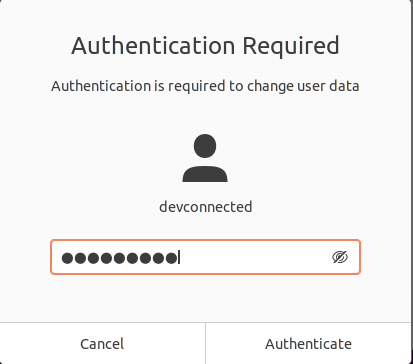
Now that the panel is unlocked, you can tick the “Administrator” radio button in order for your user to be part of the administrators!
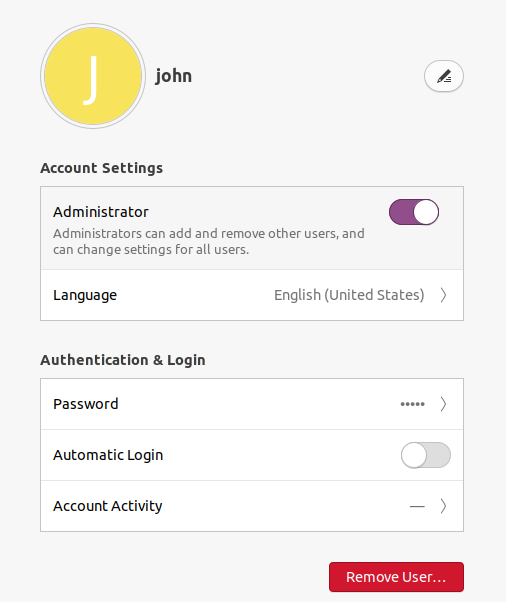
You can even verify that your user is part of the sudo group using the “groups” command.
$ groups john
Congratulations, your user is now part of the sudo group!
Adding a group to the sudoers file
In the previous section, we added a user to the sudoers file, but what if you wanted to give those rights to an entire group?
To add a group to the sudoers file, add a “percent” symbol at the beginning of the line, just before the name of the group.
%sysadmins ALL=(ALL:ALL) NOPASSWD:ALLNext, make sure that you are part of the designed group and execute your command using “sudo”.
$ groups
user sysadmins $ sudo passwd
Congratulations, you set “sudo” privileges to an entire group!
Conclusion
In this tutorial, you learnt how you can easily add a user to sudoers using three different methods : using the command-line, the visudo command or using the graphical interface.
If you are interested in Ubuntu 20.04, we wrote a guide on installing and enabling a SSH server.
Also, if you are interested in Linux System Administration, we have an entire section dedicated to it on the website, so make sure to check it out!


